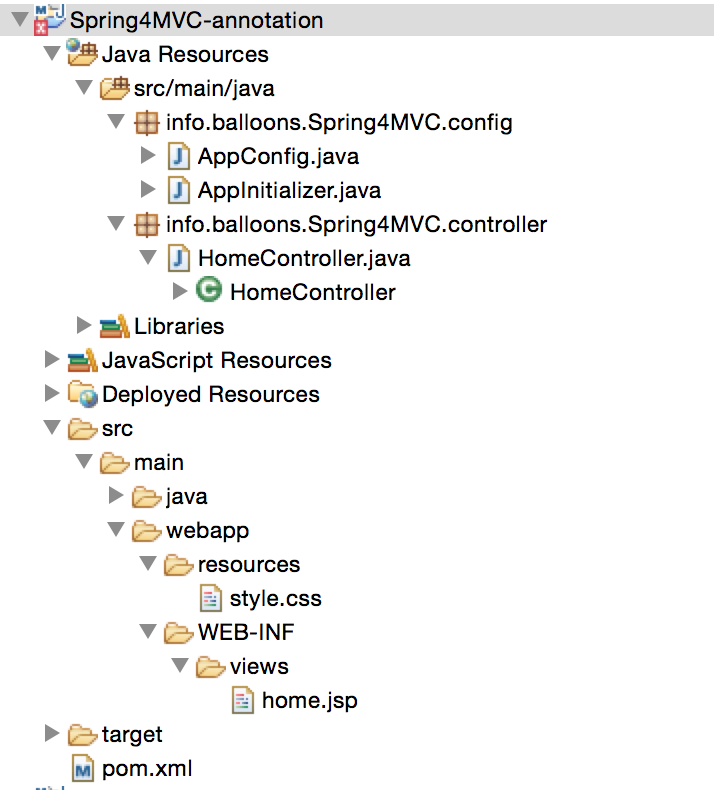
Following technologies are used.
- Spring 4.0.6.RELEASE
- Maven 3
- JDK 1.6
- Tomcat 7.0.62
- Eclipse Luna Service Release 1a
 Step 2: Updating POM.xml
	4.0.0

	info.5balloons
	Spring4MVC-annotation
	0.0.1-SNAPSHOT
	war

	Spring4MVC-annotation
	http://maven.apache.org


		1.6
		4.0.6.RELEASE
		2.2.2


			org.springframework
			spring-context
			${spring.version}


			org.springframework
			spring-webmvc
			${spring.version}


			org.springframework
			spring-test
			${spring.version}
			jar
			test


			javax.servlet
			javax.servlet-api
			3.1.0


			javax.servlet.jsp
			javax.servlet.jsp-api
			2.3.1


		    javax.servlet
		    jstl
		    1.2


			springsource-milestones
			SpringSource Milestones Proxy
			https://oss.sonatype.org/content/repositories/springsource-milestones


		Spring4MVC-annotation


				org.apache.maven.plugins
				maven-compiler-plugin
				2.0.2

					${java.version}
					${java.version}


			    maven-war-plugin
			    2.4

			        false
First thing to notice here is the maven-war-plugin declaration. As we are using full annotation configuration, we don’t even include web.xml in our project, so we will need to configure this plugin in order to avoid maven failure to build war package.
Along with that, we have also included JSP/Servlet/Jstl dependencies which we will be needing as we are going to use servlet api’s and jstl view in our code. In general, containers might already contains these libraries, so we can set the scope as ‘provided’ for them in pom.xml.
Rest of the dependencies are for Spring Library.
Step 3: Java Based Configuration
info.balloons.Spring4MVC.config.AppInitializer
package info.balloons.Spring4MVC.config;

import javax.servlet.ServletContext;
import javax.servlet.ServletException;
import javax.servlet.ServletRegistration;

import org.springframework.web.WebApplicationInitializer;
import org.springframework.web.context.support.AnnotationConfigWebApplicationContext;
import org.springframework.web.servlet.DispatcherServlet;

public class AppInitializer implements WebApplicationInitializer {

	public void onStartup(ServletContext container) throws ServletException {

		AnnotationConfigWebApplicationContext ctx = new AnnotationConfigWebApplicationContext();
		ctx.register(AppConfig.class);
		ctx.setServletContext(container);

		ServletRegistration.Dynamic servlet = container.addServlet(
				"dispatcher", new DispatcherServlet(ctx));

		servlet.setLoadOnStartup(1);
		servlet.addMapping("/");
	}

}
The above chunk of code does the same job as your web.xml file
info.balloons.Spring4MVC.config.AppConfig
package info.balloons.Spring4MVC.config;

import org.springframework.context.MessageSource;
import org.springframework.context.annotation.Bean;
import org.springframework.context.annotation.ComponentScan;
import org.springframework.context.annotation.Configuration;
import org.springframework.context.support.ResourceBundleMessageSource;
import org.springframework.web.servlet.ViewResolver;
import org.springframework.web.servlet.config.annotation.EnableWebMvc;
import org.springframework.web.servlet.view.InternalResourceViewResolver;
import org.springframework.web.servlet.view.JstlView;

@Configuration
@EnableWebMvc
@ComponentScan(basePackages = "info.balloons.Spring4MVC")
public class AppConfig {

	@Bean
	public ViewResolver viewResolver() {
		InternalResourceViewResolver viewResolver = new InternalResourceViewResolver();
		viewResolver.setViewClass(JstlView.class);
		viewResolver.setPrefix("/WEB-INF/views/");
		viewResolver.setSuffix(".jsp");

		return viewResolver;
	}

}
The AppConfig class is to configure Application to be of type Spring MVC. @Configuration annotation denotes the Spring that this Java Class is used to do the Spring Configuration.
Further @EnableWebMvc does the trick of converting the Application into a Web MVC Framework (Request comes to the DispatcherServlet based upon the RequestMapping and is then transformed into a view)
@ComponentScan is used to to enable Component Scanning the base package folder.
Step 4: Add Controller to handle the request
package info.balloons.Spring4MVC.controller;

import java.io.IOException;

import javax.servlet.http.HttpServletResponse;

import org.springframework.stereotype.Controller;
import org.springframework.web.bind.annotation.RequestMapping;
import org.springframework.web.servlet.ModelAndView;

@Controller
public class HomeController {

	@RequestMapping(value="/")
	public ModelAndView test(HttpServletResponse response) throws IOException{
		return new ModelAndView("home");
	}
}
@Controller annotation specifies that this Java class is a controller and will have Methods mapped to the RequestMappings.
I have added a @RequestMapping with value "/" that denotes the website index URL, This method returns home as the ModelAndView.
Thus Spring will look for the home.jsp page in the /WEB-INF/views directory as we have configured in our AppConfig class
Step 5 : Add view in WEB-INF/views directory
<%@page contentType="text/html" pageEncoding="UTF-8"%>
        Home
Hello World!
This is the homepage!
Step 6 : Build and Deploy
You need to have a server that supports Servlet 3 API to run this Application. Since annotation based Java configuration is supported by Servlet 3.
I am using Tomcat 7. With Eclipse you can right click on the application and choose to Run on the Server.
Or If you do a mvn install, project will generate a war which you can copy in your tomcat/webapps Folder.
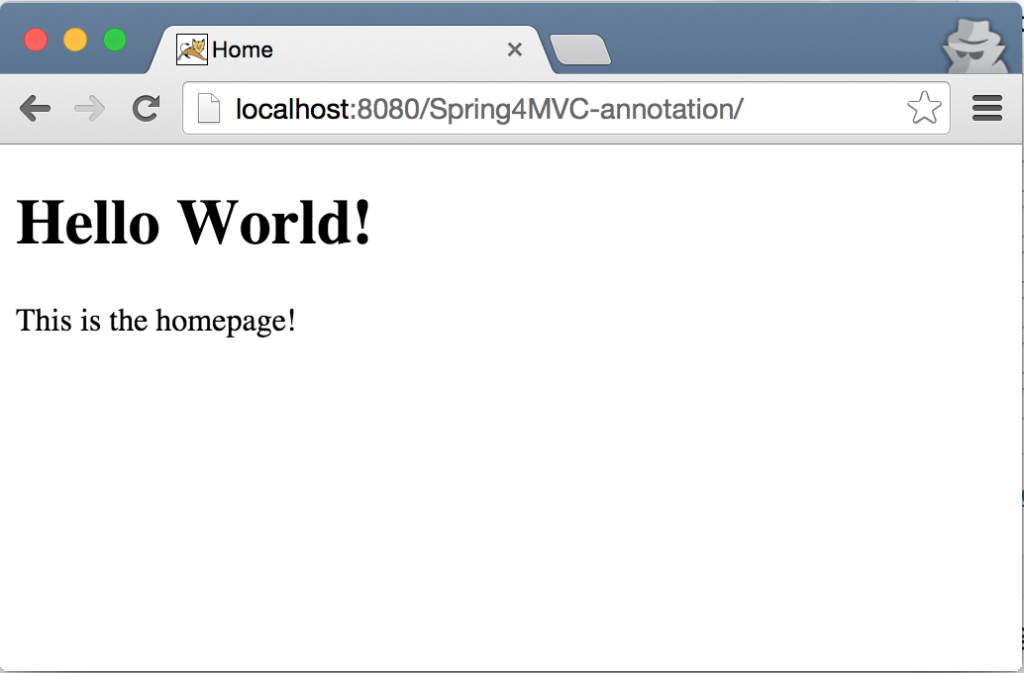
Start the server and access the application via http://localhost:8080/Spring4MVC-annotation/ , You should be able to see the Home Page
