In this article we will see how we can add a separate virtual domain in XAMPP.
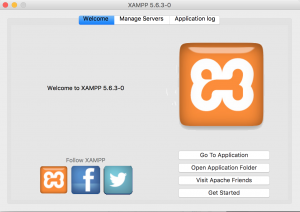
[caption id="attachment_674" align="aligncenter" width="300"] XAMPP Console[/caption]
Objective :
- To be able to access php code via XAMPP that is in a directory other than htdocs which is the default directory under XAMPP to store applications.
- To have a different domain name on your localhost to access different application. For example if you are developing an application with name SampleGame, you can set domain under virtual host to access it by samplegame.local/
- To be able to access your domain other then localhost via https , i.e. adding SSL support on your XAMPP localhost for newly created localhost.
Steps :
Let's consider you have an php application which you have stored under /Users/myusername/Projects/myNewApp in the following steps we will configure our XAMPP to run this application along with SSL support.
- Open the XMAPP virtual host configuration file (
httpd-vhosts.conf) in your editor. This file contains the Virtual host setting. Add the following entry in the file. The file is located at/XAMPP/xamppfiles/etc/extra
<VirtualHost *:80>
    ServerName mynewapp.local
    DocumentRoot "/Users/myusername/Projects/myNewApp"
    <Directory "/Users/myusername/Projects/myNewApp">
        Options Indexes FollowSymLinks Includes ExecCGI
        AllowOverride All
        Require all granted
    </Directory>
    ErrorLog "logs/mysite.local-error_log"
</VirtualHost>
This entry denotes the path of your Application via DocumentRoot Entry, and also defines a ServerName for our application i.e. myNewApp.local
2. Along with this configuration, we need to enter the entry of this new ServerName into OS's hosts config file. In mac osx the hosts config file is located at /etc/hosts. Open the hosts file into editor and put following entry into it
127.0.0.1 mynewapp.local
3. Restart your apache, you should be able to access the application via mynewapp.local in your browser.
4. Now for some reasons you might want to add SSL support to your localhost, so that you can replicate the production settings on your local, Or there are some third party payment gateway API's which can only be integrated under secured url's. This is how you can configure it.

Open the ssl configuration file of XAMPP (httpd-ssl.conf) which is located at /XAMPP/xamppfiles/etc/extra for OSX version of XAMPP. Add the following entry to this file.
<VirtualHost *:443>
    ServerName pedstest.local
    DocumentRoot "/Users/myusername/Projects/myNewApp"
    SSLEngine on
    SSLCertificateFile "/Applications/XAMPP/xamppfiles/etc/ssl.crt/server.crt"
    SSLCertificateKeyFile "/Applications/XAMPP/xamppfiles/etc/ssl.key/server.key"
    <Directory "/Users/tgugnani/Projects/public_html/public">
        Options Indexes FollowSymLinks Includes ExecCGI
        AllowOverride All
        Require all granted
    </Directory>
    ErrorLog "logs/mysite.local-error_log"
</VirtualHost>
This entry defines the SSL certificate and key file location which are provided by XAMPP default installation.
5. Restart your apache and you should be able to access the new domain on localhost via https://
Please comment for questions if you have trouble following the steps.