If you are one of the early developers who adopted M1 Mac and willing to use HomeBrew on the latest silicone chip.
Here is a brief tutorial for you to Install and use HomeBrew on M1 Macs
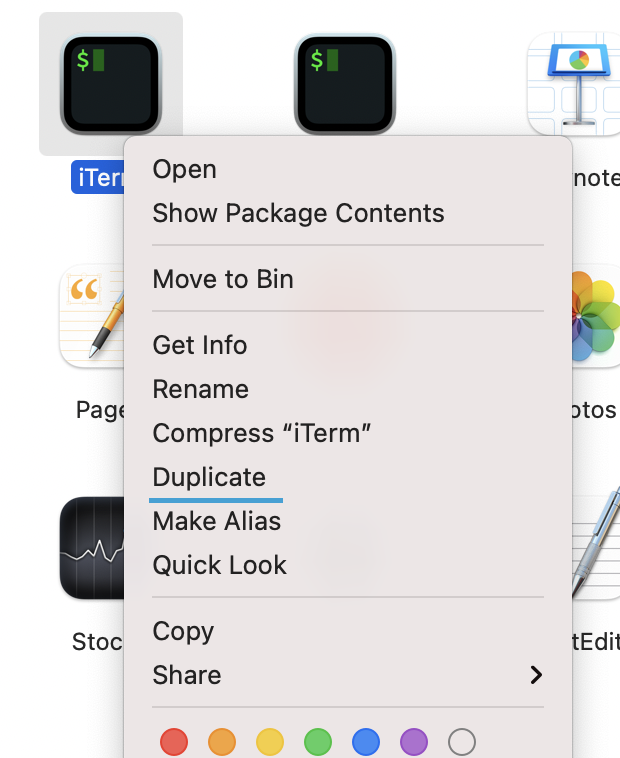
Make a duplicate of your Terminal for Rosetta
Go to your applications folder and locate your favourite terminal, I use
iTerm2, Right click on the terminal icon and choose Duplicate.
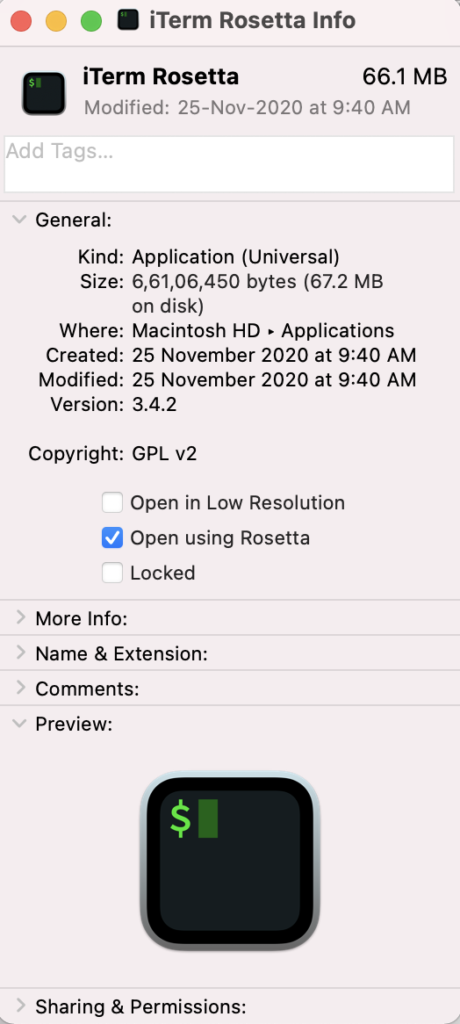
This will create a copy of your Terminal in the Applications folder. Rename the newly created copy to be Terminal Rosetta (iTerm2 Rosetta in my case).
Right click on the newly created copy and choose
Get Info, Click the
Open with Rosetta option to be marked checked.
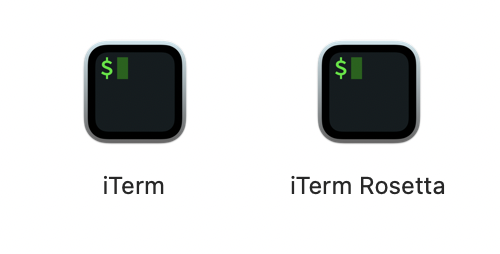
Now I have two iTerm2 applications, one that runs default settings and another that runs using Rosetta.
Install HomeBrew using Rosetta Terminal
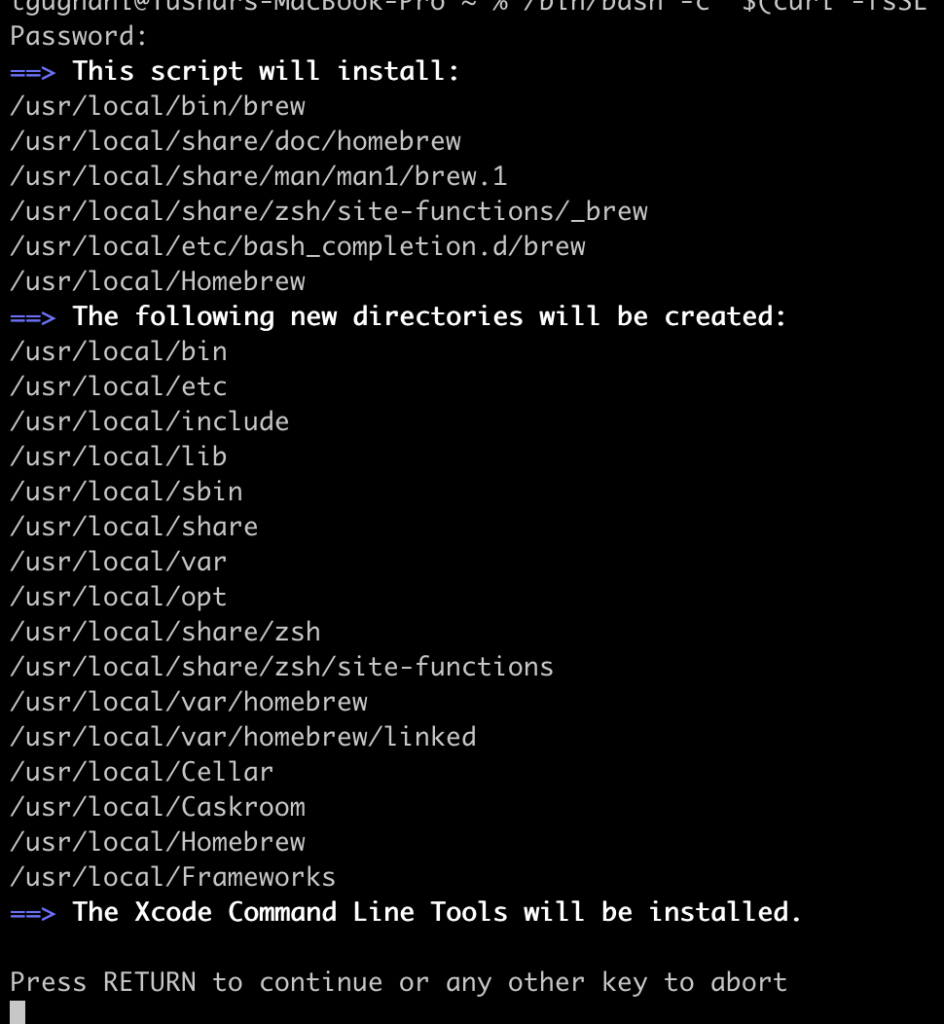
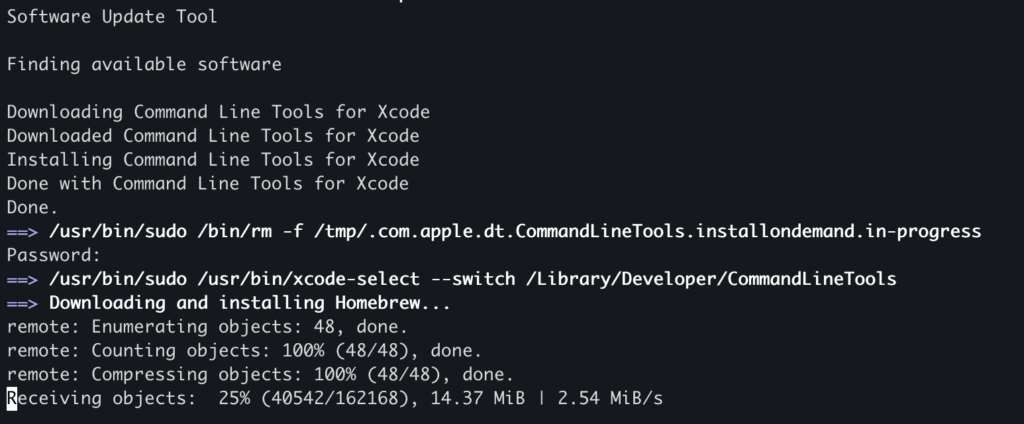
To Install HomeBrew open the Rosetta Terminal and run the following command
/bin/bash -c "$(curl -fsSL https://raw.githubusercontent.com/Homebrew/install/HEAD/install.sh)"
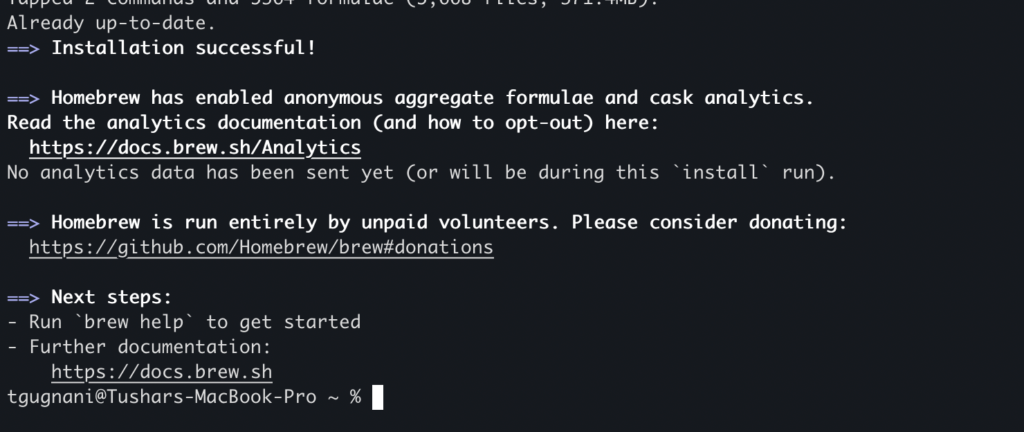
Running this command will ask you for the password, and then It will provide you with the information of what all it will install and which new directories it will create.
Once you press Enter, it will begin the installation process and will also dump the logs of the process.
Using HomeBrew
Once HomeBrew is installed, you can start using it to installed your required packages into the mac
Run the following command to get brew help
brew help
To install a package, you can run the following command
brew install packagename
That's all about Installing and getting started with Homebrew on Apple M1 Macs