As you work along with Vue.JS you'll realize that there are custom components in your application which you might need to use over and over in other applications as well. Or there might be a very useful component that you have developed that you wish to share it with others.
It's about time that you publish your very first Vue component as an NPM package.
In this tutorial let's go through the detailed steps and also uncover how easy it is to publish vue packages on NPM.
We'll develop a very very simple Hello World Vue component, and then publish it as an NPM package.
Let's dive in
# Set Up Vue Project
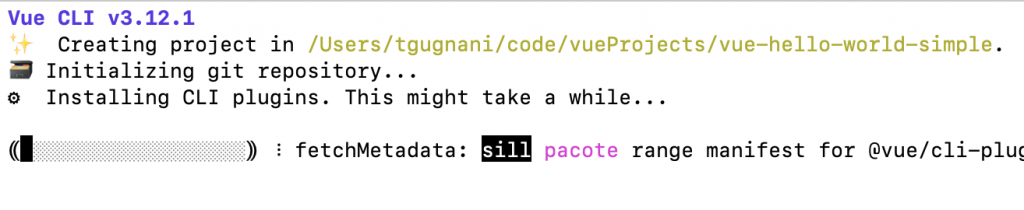
In this step, we'll set up a new Vue project; wherein we'll do our component development. I am using Vue CLI to create a new project. Go ahead and run following command in your terminal
vue create vue-hello-world-simple
I am using Vue CLI v3.12 to create a new Vue project. You can follow along with the detailed instructions on How to
install and
create a new Vue CLI Project.
Push the project to Github
Vue CLI project by default comes with an initialized git repository. Create a new blank repo on github and push the changes.
cd vue-hello-world-simple
git remote add origin https://github.com/tushargugnani/vue-hello-world-simple
git push -u origin master
Hello World Component
The default Vue Project comes with a
HelloWorld.vue component, Let's modify the component to make it a really simple component that does nothing and just spits out Hello World
<template>
  <div class="hello">
    Hello World
  </div>
</template>

<script>
export default {
  name: 'HelloWorld',
}
</script>

<!-- Add "scoped" attribute to limit CSS to this component only -->
<style scoped>

</style>
Alright, you have your HelloWorld component ready which you want to build and publish as a package to share it with the world.
# Step 1 Entry Point and Install Method
First things first, we need to create an entry point of our plugin, This entry point is the first file that gets executed when someone installs the plugin in their project.
VueJS plugins are basically objects with an
install function. It gets executed whenever a consumer application includes the plugin with
Vue.use().
This entry file should contain an install method, which basically registers all the components you have in your application.
Create a new file name
install.js in your src directory.
import HelloWorld from "./components/HelloWorld.vue";

const HelloWorldSimple = {
 install(Vue, options) {
  // Let's register our component globally
  // https://vuejs.org/v2/guide/components-registration.html
  Vue.component("hello-world", HelloWorld);
 }
};

// Automatic installation if Vue has been added to the global scope.
if (typeof window !== 'undefined' && window.Vue) {
    window.Vue.use(HelloWorldSimple);
}

export default HelloWorldSimple;
The
install the method receives the global
Vue object as a parameter, as well as an options object.
#Automatic Installation
For people who use your plugin outside of a module system, it is often expected that if your plugin is included after the Vue script tag, that it will automatically install itself without the need to call
Vue.use(). We have implemented this by checking if Vue included in the global scope and then calling window.vue.use(PluginName);
# Step 2 Configuring Package.json
To be able to build our VueJS plugin, there is a lot of configuration that needs to be done in the package.json file that is available in your project. NPM uses a
package.json file to get information on how to build this project and also all other semantic details.
Let's configure
package.json the file step by step.
# Setting up Library Build
To be able to package our Components as a library let's utilize the
vue-cli-service binary to create a command that will build the project and also specify the target filename
vue-cli-service build --target lib --name myLib [entry]
Here
myLib is the name that you want to specify to your build files, I will keep it same as my plugin name. and [entry] is the entry point of your plugin. In this case I will point it to the install.js file that we created in the last step.
Let's add a new command named build-library and specify the proper vue-cli-service build command for it.
"scripts": {
"serve": "vue-cli-service serve",
"build": "vue-cli-service build",
"build-library" : "vue-cli-service build --target lib --name vue-hello-world-simple ./src/install.js",
"lint": "vue-cli-service lint"
},
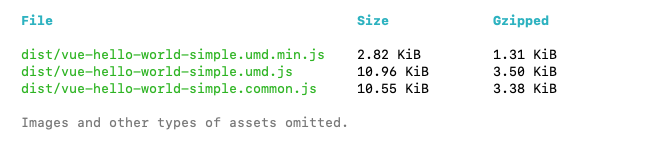
You can test if your new build command works fine by running the command in your project root directory
npm run build-library
This generates an output similar to this:
# Pointing to Right Output File
NextUp, we need to specify the correct output file in our package.json. Make sure your main attribute in package.json is correctly pointing towards your output file. I prefer using the commonjs bundle.
"main" : ".dist/vue-hello-world-simple.common.js",
# Configure Files Attribute
Files attribute determines what files and folders will be published by NPM. If this option is not set, it will look at the .gitignore (or .npmignore, but we have none) file for inspiration.
If you are looking to
publish only the compiled source code to the NPM, you can mark your files attribute to
"files": ["dist/*"],
Usually, only pushing the compiled source code to NPM is the right way to publish to NPM. Libraries are for compiled code that is optimized for production and Version control systems (such as Github) are for the underlying source code.
However, if you have a reason to
publish all your components source and other files to NPM then you can include them in the files property.
"files": [
  "dist/*",
  "src/*",
  "public/*",
  "*.json",
  "*.js"
],
# Configuring General Properties
Let's edit a few other general properties in our package.json file, and also understand what each one of those signifies.
Here is how my package.json looks
{
    "name": "vue-hello-world-simple",
    "description": "A simple vuejs Hello World plugin",
    "version": "0.1.0",
    "private": false,
    "author": {
        "name": "Tushar Gugnani",
        "email": "tushar@5balloons.info"
    },
    "repository": "https://github.com/tushargugnani/vue-hello-world-simple",
    "bugs": "https://github.com/tushargugnani/vue-hello-world-simple/issues",
    "keywords": ["keywords", "go", "here"],
    "license": "MIT",
    "files": ["dist"],
    "scripts": {
      "serve": "vue-cli-service serve",
      "build": "vue-cli-service build",
      "build-library" : "vue-cli-service build --target lib --name vue-hello-world-simple ./src/install.js",
      "lint": "vue-cli-service lint"
    },
    "main" : ".dist/vue-hello-world-simple.common.js",
...
...
}
A quick run through the properties:
name — Name for the package that will appear in NPM.
version — Semantic version. We will get to that in further steps.
private — true or false. NPM will try to publish publicly, and that will fail if you have the package set to private.
description, author, repository, bugs, keywords, license — Additional info for use in NPM.
# Step 3 Update README.md and Include a License file.
#README.md
Adding proper installation instructions for your plugin in README.md file is important since it gives clear instructions to the user on how to use this plugin.
Content of README.md appears both on NPM page of your plugin as well as the github repository page.
You can use this checklist to see what needs to be included
- What problem your plugin solves?
- How do I install it?
- How do I use/interact with it?
- Which license is applied?
Optionally you can include these as well.
- Some examples of how the plugin works?
- How does it work?
- Project status: builds/tests?
- How can I contribute?
- Which technologies have been used?
#LICENSE.md
You may also want to add a license file to your plugin since you are distributing it through open source. Creating a license file is simple.
Go to your Github repository and choose the option to create a new file.
Name the file License.md , it should give you an option to choose the license template

I have used MIT license template for this project.
Commit the new file.
# Step 4 Publish to NPM.
It's time to publish your repository to NPM.
# Login to NPM
If you aren't;t already registered as a user on NPM, you can create a new account by executing following command
npm adduser
If you already have an account you can login use following command
npm login
If you are already logged in and want to verify the user, you can execute
npm whoami command.
# Build and Publish
npm run build-library
npm publish
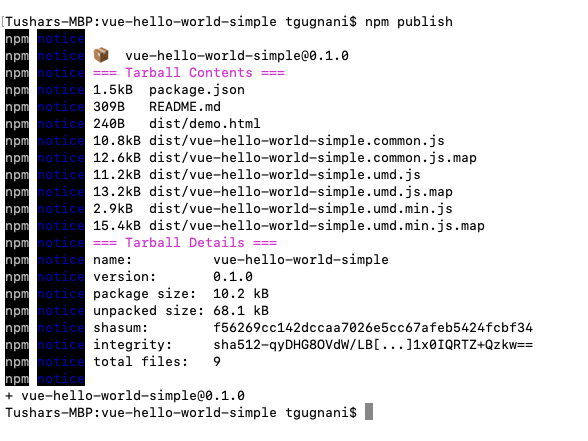
Almost immediately, your package will be visible to the world at URL npmjs.com/packages/yout-package-name. In my case, it's available at https://www.npmjs.com/package/vue-hello-world-simple
Congratulations on having your first package published to NPM.
# Using the Package
Since now have our package published, Let's take a look at how we can use this package in other repositories
To Install
npm install --save yourPackagename
Once you have installed the package, in your entry file of the repository (main.js) if you are using it in a Vue CLI project. Write the import command
import HelloWorldSimple from 'vue-hello-world-simple'
To install it globally.
Vue.use(HelloWorldSimple)
If not globally, you can also import the individual components locally.
import 'HelloWorld' from 'vue-simple-hello-world'
# Updating the package and versioning
So you have the package published on NPM and now you need to change certain things on the package and re-publish it with new changes. This process involves a list of steps which I am listing down below.
- Make changes to the codebase
- Before we can publish the changes we need to make sure the working directory is clean
git add -A

git commit -m "Fix bug in the package"
-
- Increment the version number in NPM
NPM follows the semantic version (semver) versions, in which each number denotes if it's a major release, minor change, or a patch fix. (Read details about semver
here )
In this case, let's just bump the patch version by 1
npm version patch -m "Minor changes to the Hello World Text"
This will update the version number in your package.json file.
And since we have the GitHub repository linked to the npm. It will also create a tag for the bumped up version number.
Run the following command to check the latest tag
git tag
Next up, push the latest changes to git along with the new tag.
git push --follow-tags
Now you can go ahead and publish the new changes on npm
npm publish
If these seems like too many steps for you, you can checkout automatic tool for you like
np, which can make your job easier of maintaining the version and publishing changes to Github and npm.
That's all about creating Vue package and publishing it on NPM.