
This post goes through the steps of creating a new Amazon Elastic Beanstalk Tomcat instance and once it is created we will SSH into it via Terminal.
Step 1: Creating New Beanstalk Application
-
- Login into your AWS Console
- Choose the instant type as Tomcat and Click Launch Now
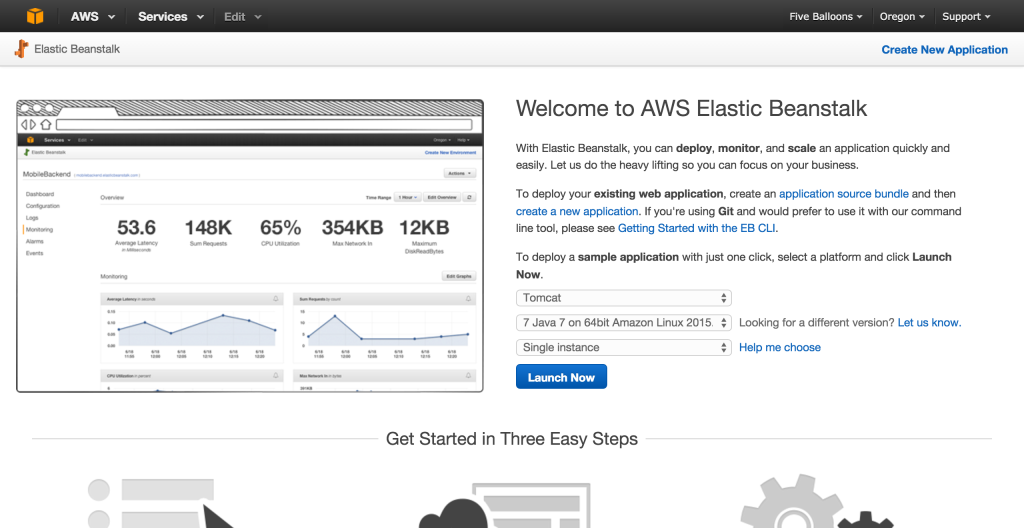
- Wait for the Sample Application to deploy.
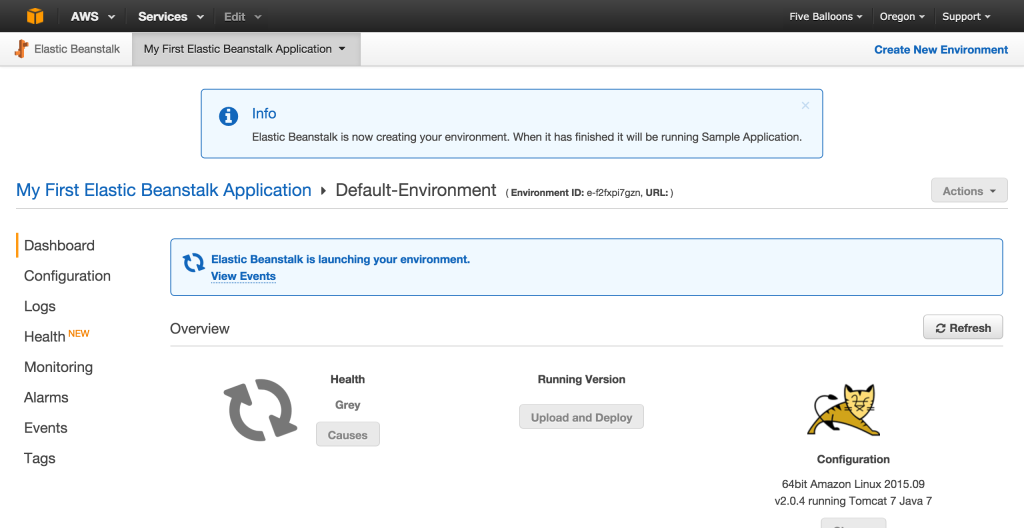
- Once the application Health Status is green, click on the application URL to check if the sample application is deployed successfully.


Step 2: Create Public-Private Key Pair
- In AWS Service console, Select EC2 to go to the EC2 dashboard, Since we have launched a beanstalk application, it should have a respective EC2 instance associated with it

- From the EC2 dashboard select Key Pairs from the left hand panel
- Click Create Key Pair (at top) and enter a name such as myname-key-pair-myregion or whatever valid key name you like.
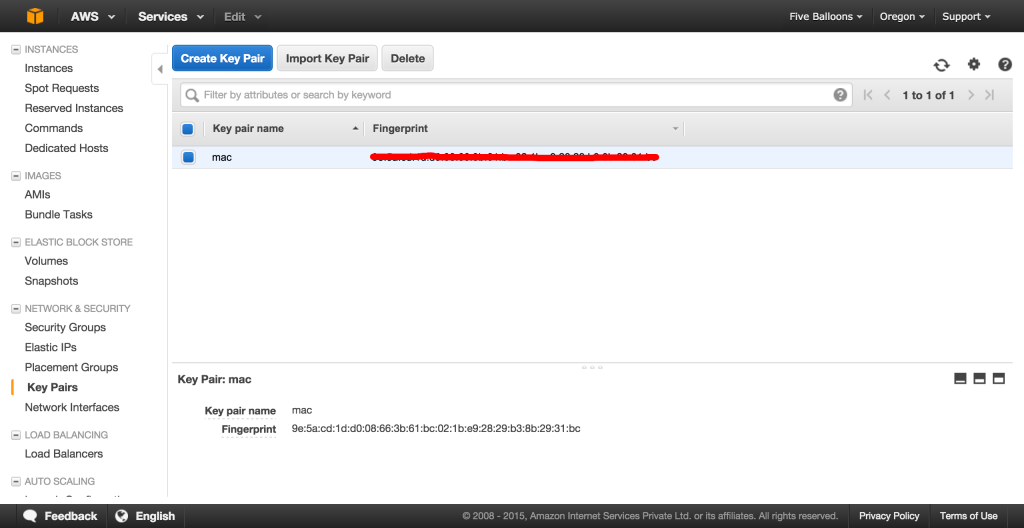
- Confirm and then accept the download of the private key from the browser saving it for instance to your home directory or wherever you fancy. Make sure the directory only has write permissions for you.


Step 3: Associate the Public Private Key Pair with the Elastic Beanstalk EC2 Server
- To add a public-private key pair to an Elastic Beanstalk EC2 instance do: Services -> Elastic Beanstalk -> My App -> Default Environment takes you to the default environment (the one where you upload your app)
- Click Configuration (on left hand panel) and then on the gear/cog associated with "Instances"
- Click on settings button for the server widget
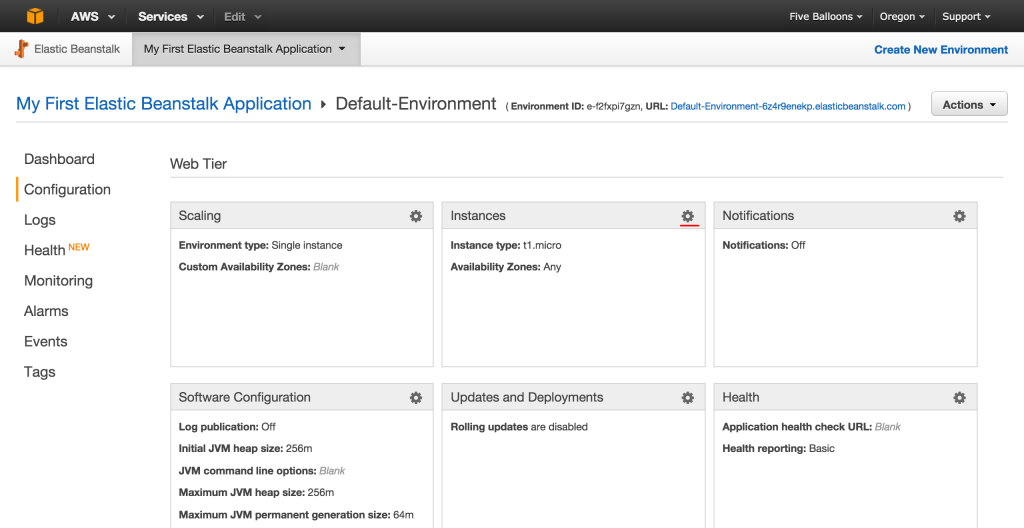
- Associate the key you generated in the EC2 Key Pair Drop Down
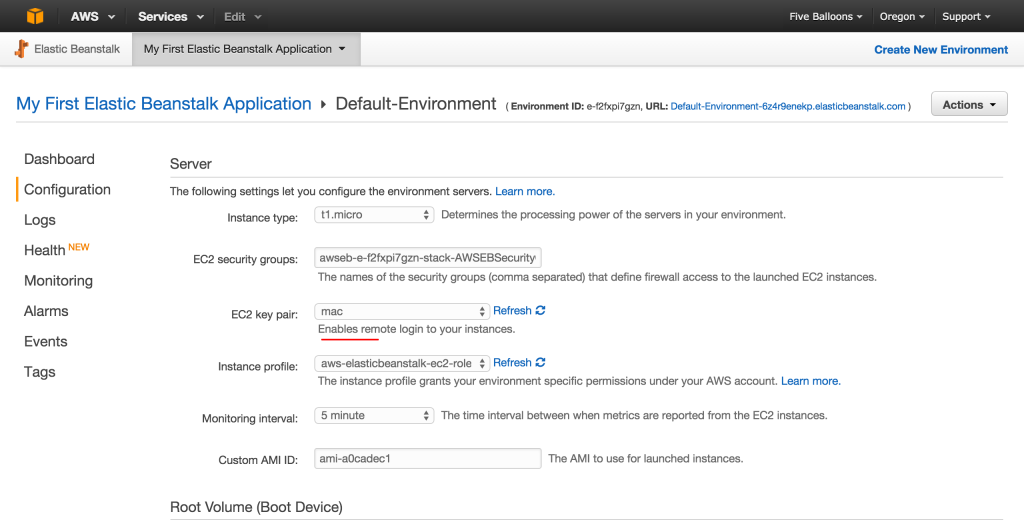
- Click "Apply" to save the changes


Step 4: Connect to AWS EC2 Instance using SSH
- Open terminal and Do: ssh -i ./myname-key-pair-my-region.pem ec2-user@ec2-some-address.us-west-2.compute.amazonaws.com
- You should be able to SSH into your EC2 instance
- If you receive this error "WARNING: UNPROTECTED PRIVATE KEY FILE!" then change the permissions for your pem file to either 400 or 600 chmod 600 Downloads/mac.pem


If you face issues while connecting to ec2 instance through SSH , check the security group settings.
Step 5: Configure Security Group
- In the AWS console, select EC2 to go to the EC2 Dashboard
- Discover the security group to which your EC2 instance belongs by clicking Instances in the left hand panel and then selecting the instance you want to connect to (in my case there is only one - called Default Environment). The details are shown at the base of the page - You should see a field for Security Groups - make a note of the name - in my case "awsweb...".
- From the left hand panel select Security Groups.
- Select the awsweb... security group and the details should show at the base of the page
- Select the Inbound tab and choose SSH from the "Create a New Rule" drop down. Insert the ip address/CIDR of your local machine (from which you intend to connect), e.g. 192.168.0.12/32 or Anywhere if you want to able to connect from any IP, and click Add Rule and Apply Rule Changes.
Source : http://stackoverflow.com/a/18556518
Comments