I am new to the world of static site generators and after a couple of hours of research I zeroed down to using 11ty / eleventy to build a simple static site.
Here I am presenting you the simplest guide to getting started with 11ty / eleventy static site generator.
1. Create a new directory / folder
As simple as it sounds create a new directory in your operating system, you can create this anywhere you want to keep your website. I am using mac and I am creating a new folder in the
~/code location.
mkdir new-project
2. Install 11ty / eleventy dependency
In order to install 11ty , you will need to make sure you have
node12 or higher installed on your system. Run the command
node --version to verify
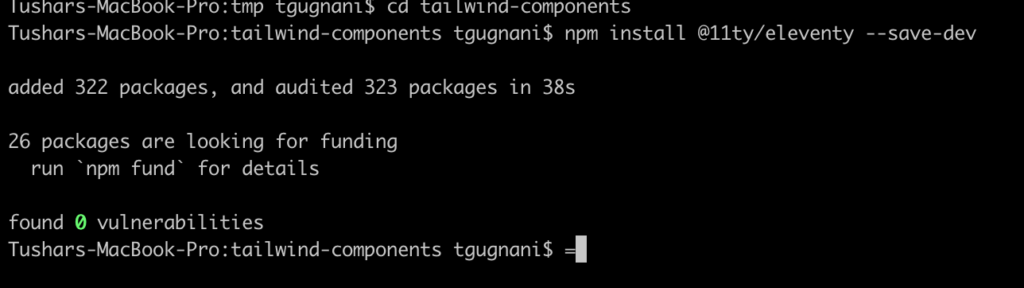
Next up, move into the newly created project directory and run following command
npm install @11ty/eleventy --save-dev
This will install 11ty as well as the additional dependencies.
3. Run Eleventy
We can use npx to run our local project's version of Eleventy. Let’s make sure our installation went okay and try to run Eleventy:
npx @11ty/eleventy
This should return the following output
Wrote 0 files in 0.03 seconds (v1.0.1)
Make sure that you see (v1.0.1) in your output. This lets you know you’re using the newest version. However, Eleventy didn’t process any files! This is expected—we have an empty folder with no templates inside.
4. Create a Template File
Now since the Eleventy is now running, let's see if we can get started to see some output in the browser. Create a file named
index.html in the root directory of your project.
<!DOCTYPE html>
<html lang="en">
<head>
    <meta charset="UTF-8">
    <meta http-equiv="X-UA-Compatible" content="IE=edge">
    <meta name="viewport" content="width=device-width, initial-scale=1.0">
    <title>Eleventy & TailwindCSS</title>
</head>
<body>
    Hello World
</body>
</html>
Now if you run the command
npx @11ty/eleventy again, you should see the output
Wrote 1 files in ...
This means that Eleventy is working fine and it will generate a output file named
index.html in the
_site directory.
5. Run Eleventy
Time to see the output in the browser. Run the following command
npx @11ty/eleventy --serve
You should see the following output in the console
[11ty] Writing _site/index.html from ./index.html (liquid)
[11ty] Wrote 1 files in 0.21 seconds (v1.0.1)
[11ty] Watching…
[Browsersync] Access URLs:
 -----------------------------------
    Local: http://localhost:8080
 External: http://192.168.0.109:8080
 -----------------------------------
[Browsersync] Serving files from: _site
Open the browser and navigate to
localhost:8080, you should be able to see the output of the
index.html file in the browser.
6. Using Simple Style CSS
Before we go over the tailwindCSS installation. Let's first understand how 11ty handles asset files by using an example of styling through a simple css rule stored in
style.css file.
Create a file named style.css in the root folder of your project with following style
h1{
    color:red;
}
Also edit your
index.html file to include this stylesheet.
<!DOCTYPE html>
<html lang="en">
<head>
    <meta charset="UTF-8">
    <meta http-equiv="X-UA-Compatible" content="IE=edge">
    <meta name="viewport" content="width=device-width, initial-scale=1.0">
    <link href="/style.css" rel="stylesheet" />
    <title>Eleventy & TailwindCSS</title>
</head>
<body>
    <h1>Hello World</h1>
</body>
</html>
When you will see the output in the browser you will notice that the style has not been applied and browser cannot find the
style.css file. This is because style.css file in not copied to the
_site directory from where the pages are being served.
To fix we need to tell 11ty to copy the style.css file to the _site directory, we can do so by mentioning that in eleventy configuration file.
7. 11ty Configuration File
Create a new file named
.eleventy.js in the root folder of your project. This is eleventy configuration file.
Put the following contents in the file.
module.exports = function(eleventyConfig) {
    // Output directory: _site

    // Copy `style.css` to `_site/`
    eleventyConfig.addPassthroughCopy("style.css");
};
Now if you refresh the browser you should see the style being applied, since 11ty has copied the style.css file into the _site directory.
Now that we have understood the process of 11ty handling the asset files, you can remove the style.css file from root folder as well as _site folder. We will also comment the line in configuration file that copies the style.css file.
8. Installing TailwindCSS
Let's install tailwindcss in this project using Tailwind CLI.
Run the following command to install TailwindCSS and generate its config file
npm install -D tailwindcss
npx tailwindcss init
This will install tailwindCSS and you will have a
tailwind.config.js file in your project root directory.
The default
tailwind.config.js file should look something like below
/** @type {import('tailwindcss').Config} */
module.exports = {
  content: [],
  theme: {
    extend: {},
  },
  plugins: [],
}
9. Configure your template paths
In the tailwind config file we need to specify the path wherein we will be having our files with tailwind utility classes. We need to specify this so that tailwindCSS can scan the files and only generate utility css for the utility classes mentioned.
Since our output html files will be in the
_site directory, let's change the content path to following
/** @type {import('tailwindcss').Config} */
module.exports = {
  content: ["./_site/**/*.{html,js}"],
  theme: {
    extend: {},
  },
  plugins: [],
}
10. Change the input directory
For the better code structure let's create a new folder named
src inside the root directory, this is where we will keep all our source files i.e css to build, layout files etc.
We need to tell 11ty that we will keep all our source files will be in
src directory instead of the default root directory.
Add the following changes in
.eleventy.js file
module.exports = function(eleventyConfig) {
    // Input Directory : src Output directory: _site

    return {
        dir: { input: 'src', output: '_site' }
    };
};
12. Add the Tailwind directives to your CSS
Create a new folder named
tailwind.css inside
src > css directory with following content
@tailwind base;
@tailwind components;
@tailwind utilities;
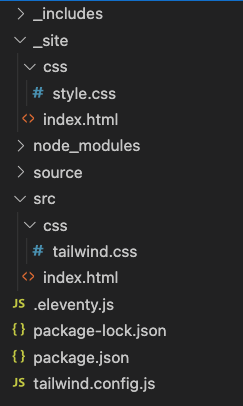
Also create a new file named
index.html inside the src directory with following content
<!doctype html>
<html>
<head>
  <meta charset="UTF-8">
  <meta name="viewport" content="width=device-width, initial-scale=1.0">
  <link href="/css/style.css" rel="stylesheet">
</head>
<body>
  <h1 class="text-3xl text-green-800 font-bold underline">
    Hello world!
  </h1>
</body>
</html>
13. Start the TailwindCSS build process
Run the following command to start the tailwindcss build process
tailwindcss -i ./src/css/tailwind.css -o ./_site/css/style.css --watch
14. Combine Eleventy and TailwindCSS build process
Let's modify our package.json file to add a build script so that we can combine the build process of eleventy and tailwindcss. So that we can experience the hot reloading of both 11ty and tailwindcss with a single build command.
{
  "scripts": {
    "build": "eleventy --serve & tailwindcss -i ./src/css/tailwind.css -o ./_site/css/style.css --watch",
    "build:prod": "eleventy & tailwindcss -i ./src/css/tailwind.css -o ./_site/css/style.css --minify"
  },
  "devDependencies": {
    "@11ty/eleventy": "^1.0.1",
    "tailwindcss": "^3.1.6"
  }
}
To run the build locally you can run the
npm run build command and to run it for making production ready you can now run
npm run build:prod command.