
Deploy Laravel Application on Shared Hosting
In this tutorial, I will demonstrate the steps involved to deploy Laravel Application on Shared Hosting. I am demonstrating the steps on Hostgator.
The steps involved to Host Laravel Application on Shared Hosting will be pretty much same for any other Hosting as well.
Note: This tutorial will work well for Installing your Laravel Project to SiteGround, Bluehost, GoDaddy and other shared hosting servers.
Before moving forward make sure you have following Ready.
- Shared Hosting Account Created (Sign Up for Hostgator)
- You have Access to cPanel.
- Laravel Application source code available via Git (GitHub / Bitbucket etc.) or any other SVN
Alright, Let's dig into the steps to Deploy Laravel Application on Shared Hosting
PHP Version
Laravel 5.5 requires PHP version greater than 7.0. Hostgator comes with default of 5.4.
Login to your cPanel using credentials sent to your email on Hostgator account signup.
Choose option Change PHP Version and change the current version to >7.1
Note : You can ignore this step if your Laravel version requires PHP 5.4 or your hosing provider by defaults provides PHP v > 7.0
[caption id="attachment_1126" align="aligncenter" width="1598"]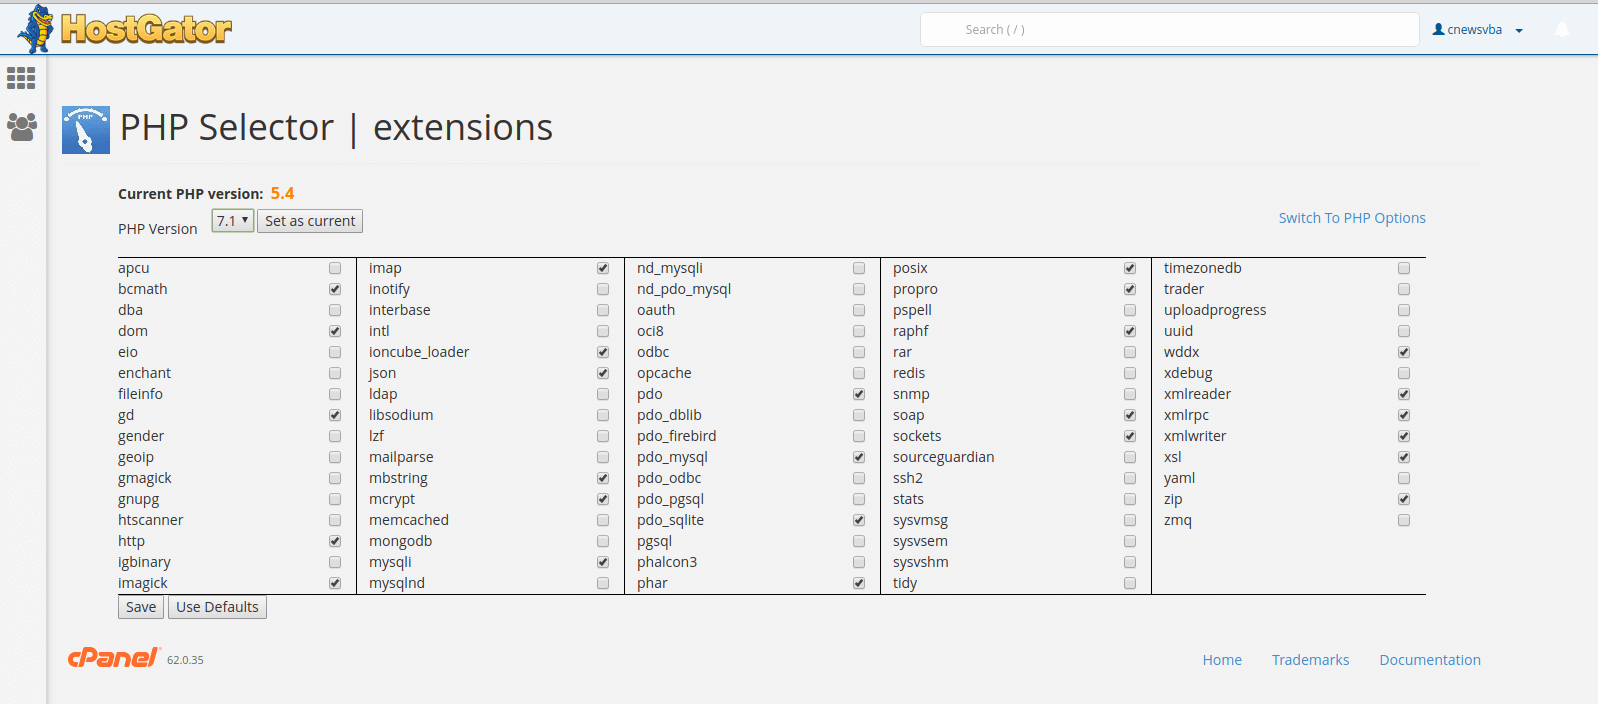 Change PHP Version Hostgator for Laravel[/caption]
SSH into Shared Hosting Box
As the first step, Open your terminal / command line and SSH into your Shared Hosting Server
Note: SSH instructions are usually included in the welcome email. Here is the general command to SSH into the Server
$ ssh [username]@[server-ip] //Replace username with cPanel username and server-ip with Server IP Address.Once it's able to connect to the server, It will prompt you for the SSH password, which should be same as your cPanel account password
The home directory structure of shared server looks something like this.
[caption id="attachment_1127" align="aligncenter" width="818"]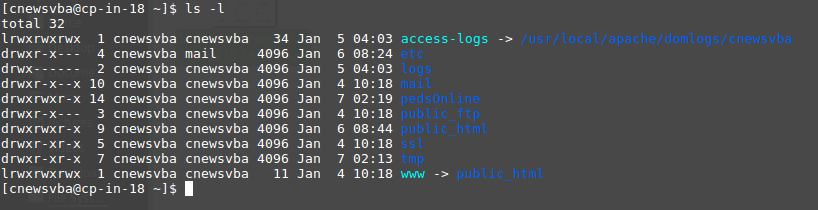 Directory Structure hostgator user home[/caption]
As you can see we have a directory public_html which is a public directory for keeping our projects. www is symlink to public_html. So basically, they both points to same stuff.
Clone Laravel Project
Let say in your hosting server (VPS, or shared hosting…whatever), you have current www/ directory, which is accessible publicly via web domain, for example:
/Users/username-blah/www/Now, clone your project in a new directory, which contains all your application source code, at the same level as www/, for example:
/Users/username-blah/myLaravelProject/You can use git clone command to clone your project. Something like
$ git clone https://username@bitbucket.org/username/myLaravelProject.git
Make public files available to www
Next step is to copy all contents inside the myLaravelProject/public directory to www directory. The easy example is that, with the fresh Laravel 5 installation application, the myLaravelProject/public/index.php should be copied to the www/index.php
Makes Sense?
Basically you need to run this command, on your server home directory (/home/username-blah)
$ cp -a myLaravelProject/public/. www/Now, your www should have following contents
[caption id="attachment_1128" align="aligncenter" width="540"]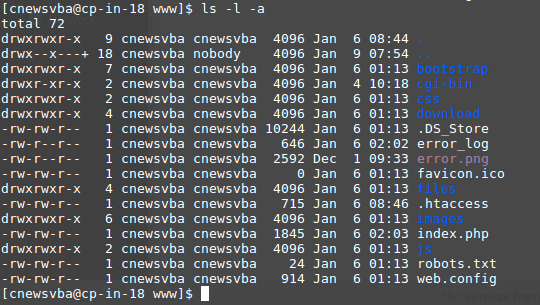 Hostgator www directory structure[/caption]
Note : Make sure you copy the public/.htaccess to the www/ also. Don’t forget this, it is very important for your app routes. Without it, your routes won’t be working and there will be a blank or empty page in every route.
Modify www/index.php to reflect new Structure
Now let’s modify the www/index.php to reflect the new structure. Don’t modify the project/public/index.php, okay? Only modify www/index.php, remember this!
Find the following line
require __DIR__.’/../bootstrap/autoload.php’;


$app = require_once __DIR__.’/../bootstrap/app.php’;
And update them to the correct paths as following
require __DIR__.’/../myLaravelProject/bootstrap/autoload.php’;

$app = require_once __DIR__.’/../myLaravelProject/bootstrap/app.php’;
We are almost there, just couple of more steps !
Modify Directory Permissions
It's time to modify directory permissions of storage and bootstrap/cache directory so that it's writable.
Move to your Laravel Project into the terminal and run the following commands.
$ sudo chmod -R 777 storage

$ sudo chmod -R 777 bootstrap/cache
.env Configuration File
There is an .env file in your project which contains all the project variables dedicated to the environment in which the project is working.
Since our .env file should not be committed to your application's source control. Your application should contain a .env.example file available. You can go ahead and copy the same file and name it .env
Generate a new application encyption key
$ php artisan key:generateNote: Make sure to clear cache via artisan command after generating the new key file (php artisan cache:clear)
Modify the .env file for other required parameters such as database variables, Mail Setting Variables. etc.
There you go !!! Everything should work now
Composer
Hostgator comes with composer (dependency manager tool) already installed and most other shared hosting server's comes with composer installed.
Check by running composer command on your terminal.
If not, you can easily install composer with following commands.
$ cd /User/username-blah/project/

$ curl -sS https://getcomposer.org/installer | php — –filename=composer
Now you can execute composer to manage dependencies.
$ php composer install

$ php composer dumpautoload -o

$ php artisan config:cache

$ php artisan route:cache
That's it ! Have fun with deployed Laravel Project.