In this tutorial we will go over on how we can implement a multi-language website in Laravel using Laravel Localization and also create a simple language switcher to change the default language.
1. Create New Laravel Application
For this demonstration I am creating a new Laravel Application, you can ignore this step if you already have the Laravel application installed in your system.
Run the following command to create a new Laravel application.
composer create-project laravel/laravel laravel-localization-demo

Once you have the project ready, you can move on to the next step.
2. Configuring the Locale for All Http Requests
The default language for your Laravel's application is stored in the
config/app.php configuration file's locale configuration option.
'locale' => 'en',
Laravel's gives you the option to change the locale for a single Http Request by executing the setLocale method on App Facade
App::setLocale($locale);, But what if once the language is changed you don't want to worry about setting the Locale and this should be taken care by an automatic code logic.
Let's create
middleware which will pick the language set in the session and will set the locale for each and every http request.
php artisan make:middleware Language
Here is the Language Middleware code
<?php

namespace App\Http\Middleware;

use Closure;
use Illuminate\Http\Request;
use Illuminate\Support\Facades\App;

class Language
{
    /**
     * Handle an incoming request.
     *
     * @param  \Illuminate\Http\Request  $request
     * @param  \Closure  $next
     * @return mixed
     */
    public function handle($request, Closure $next)
    {
        if (Session()->has('applocale') AND array_key_exists(Session()->get('applocale'), config('languages'))) {
            App::setLocale(Session()->get('applocale'));
        }
        else { // This is optional as Laravel will automatically set the fallback language if there is none specified
            App::setLocale(config('app.fallback_locale'));
        }
        return $next($request);
    }
}
In this middleware we are checking if the session has
applocale variable set and if the language belongs to the languages specified in the languages file. If yes we use the
setLocale method to change the application language.
Next up, Add the middleware entry into the
Kernel.php file
    protected $middlewareGroups = [
        'web' => [
            \App\Http\Middleware\EncryptCookies::class,
            \Illuminate\Cookie\Middleware\AddQueuedCookiesToResponse::class,
            \Illuminate\Session\Middleware\StartSession::class,
            // \Illuminate\Session\Middleware\AuthenticateSession::class,
            \Illuminate\View\Middleware\ShareErrorsFromSession::class,
            \App\Http\Middleware\VerifyCsrfToken::class,
            \Illuminate\Routing\Middleware\SubstituteBindings::class,
            \App\Http\Middleware\Language::class,
        ],
As you can guess, our next step should be to create a languages config file where we can specify the list of languages supported by the application.
Create a new file named
languages.php inside the config directory
<?php
return [
    'en' => 'English',
    'fr' => 'Français',
    'es' => 'Spanish'
];
For this demonstration I have specified three languages in the configuration file.
3. Language Switcher Backend Code
In the previous step we created a Middleware which will change the application's language depending upon the value set in the session. In this step we will work on the backend code which will set the language value in the application's session.
Let's create a simple controller method which accepts the language user wants to change and simply sets the language in the session.
Create new controller
php artisan make:controller LanguageController
<?php

namespace App\Http\Controllers;

use Illuminate\Http\Request;
use Illuminate\Support\Facades\Config;
use Illuminate\Support\Facades\Session;
use Illuminate\Support\Facades\Redirect;

class LanguageController extends Controller
{

    public function switchLang($lang)
    {
        if (array_key_exists($lang, Config::get('languages'))) {
            Session::put('applocale', $lang);
        }
        return Redirect::back();
    }
}
Let's also add the corresponding route entry in the web.php file to hit the controller method
Route::get('lang/{lang}', ['as' => 'lang.switch', 'uses' => 'App\Http\Controllers\LanguageController@switchLang']);
Alright, since we have the backend code ready we can move on to the front end part wherein we will create the ability on frontend to switch languages.
4. Creating Language Switcher Front End
In this step we'll be creating a simple language switcher, On the front end I will be using Bootstrap Framework.
Here are the steps to install the Bootstrap Framework with Auth scaffolding
//Add composer dependency for Laravel Pacakge
composer require laravel/ui
//Install Bootstrap with Auth scaffolding
php artisan ui bootstrap --auth
//npm commands
npm install
npm run dev
Once the Bootstrap is installed we can utilize the app layout file to create the language switcher.
Open the
app.blade.php file located under
resources >
views >
layouts and add the following snippted just after the login and register links in the navbar.
<li class="nav-item dropdown">
    <a class="nav-link dropdown-toggle" href="#" id="navbarDropdownMenuLink" data-toggle="dropdown" aria-haspopup="true" aria-expanded="false">
        {{ Config::get('languages')[App::getLocale()] }}
    </a>
    <div class="dropdown-menu" aria-labelledby="navbarDropdownMenuLink">
    @foreach (Config::get('languages') as $lang => $language)
        @if ($lang != App::getLocale())
                <a class="dropdown-item" href="{{ route('lang.switch', $lang) }}"> {{$language}}</a>
        @endif
    @endforeach
    </div>
</li>
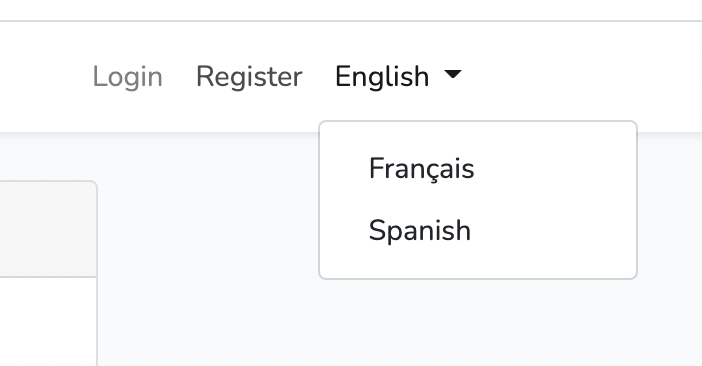
This will create a dropdown with the list of languages which the user can choose from and will also show the default language on the top.
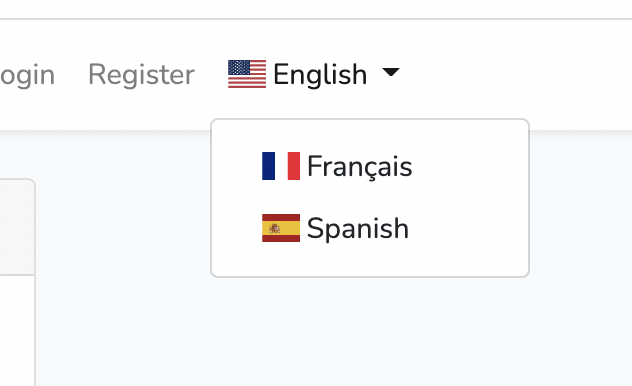
5. Adding Flags to the Language Options
How about we add the visual cue in the form of a flag just next to the language in the dropdown. Here is what needs to be done in order to achieve that.
We will make use of the library
flag-icon-css to display the country / language flag just next to the language.
Install flag-icon-css
npm install flag-icon-css
Once the package is installed, you can import the scss file by including the following lines in the
app.scss file located in resources > scss folder
// Flag Icon CSS
@import '~flag-icon-css/sass/flag-icon';
Run
npm run dev command again to compile the scss into css.
Now we can update the
languages.php file located in the config directory to include the flag-icon code associated with each language.
<?php

return [
    'en' => [
        'display' => 'English',
        'flag-icon' => 'us'
    ],
    'fr' => [
        'display' => 'Français',
        'flag-icon' => 'fr'
    ],
    'es' => [
        'display' => 'Spanish',
        'flag-icon' => 'es'
    ],
];
Let's modify the code located in
app.blade.php file to include the flag-icon as well.
<li class="nav-item dropdown">
        <a class="nav-link dropdown-toggle" href="#" id="navbarDropdownMenuLink" data-toggle="dropdown" aria-haspopup="true" aria-expanded="false">
        <span class="flag-icon flag-icon-{{Config::get('languages')[App::getLocale()]['flag-icon']}}"></span> {{ Config::get('languages')[App::getLocale()]['display'] }}
        </a>
        <div class="dropdown-menu" aria-labelledby="navbarDropdownMenuLink">
        @foreach (Config::get('languages') as $lang => $language)
            @if ($lang != App::getLocale())
                    <a class="dropdown-item" href="{{ route('lang.switch', $lang) }}"><span class="flag-icon flag-icon-{{$language['flag-icon']}}"></span> {{$language['display']}}</a>
            @endif
        @endforeach
        </div>
</li>
6. Test Localization
Let's create a sample localization language files as well as a sample page to test if all the pieces of our code works well and if we are able to achieve switching the language.
Add a new following controller method to
HomeController
public function languageDemo(){
        return view('languageDemo');
    }
Add the corresponding route file
Route::get('/languageDemo', 'App\Http\Controllers\HomeController@languageDemo');
Create a new blade file named languageDemo.blade.php inside app > resources > views directory with following content
@extends('layouts.app')

@section('content')
<div class="container">
    <div class="row justify-content-center">
        <h3>{{__('messages.welcome')}}</h3>
    </div>
</div>
@endsection
We are almost there, notice the echo statement in the above blade file. Let's create language translations file for each of the specified language.
Go to
resources >
lang directory and create messages.php file for each of the languages in their directory
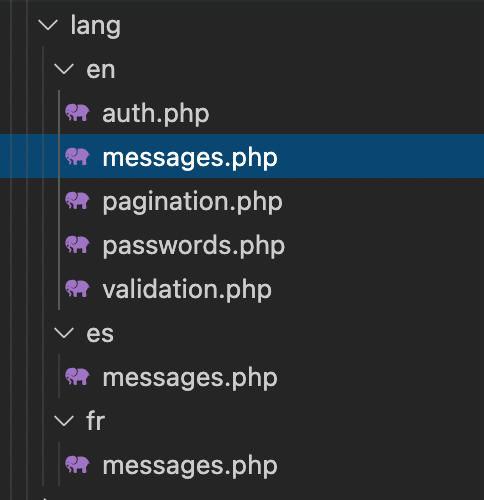
messages.php inside en directory
<?php

return [
    'welcome' => 'Welcome to our application!',
];
messages.php file inside es directory
<?php

return [
    'welcome' => '¡Bienvenido a nuestra aplicación!',
];
messages.php file inside fr directory
<?php

return [
    'welcome' => 'Bienvenue sur notre application!',
];
There you go open
/languageDemo page and you should be able to see the translations switching as you change the language from the top navbar.