In this detailed tutorial, we will cover how you can manually migrate your existing WordPress site to SiteGround Hosting.
SiteGround provides is one of the best and economical solutions for hosting your WordPress site. If you don't have a SiteGround account yet you can signup using my referral link and you will get the lowest monthly prices available.
SignUp to SiteGround.
There can be a variety of reasons for one to migrate the existing WordPress site to SiteGround. I moved my site from Bluehost to SiteGround and also at times I have a need to move the site under development from localhost to SiteGround. In all these cases you can migrate the site files and database manually.
A quick disclaimer: Even though migrating your WordPress website to SiteGround is a fairly straightforward process, there is sometimes a slight chance of things going wrong. If this isn’t something you can afford, you might want to look into hiring a dedicated WordPress developer to handle the migration process for you.
Once you have registered for the SiteGround account. The following are the steps to manually transfer your WordPress site.
Step 1: Sign in to SiteGround
Assuming that you already have a SiteGround account. If not
Register for SiteGround account first. Once you login to your account move to My Accounts Tab.

Once you are into My Accounts tab. If you have multiple websites select the site, move to the site for which you want to migrate your WordPress website.
Click on the 'Go to cPanel' button for the website for which you are migrating the WordPress site.
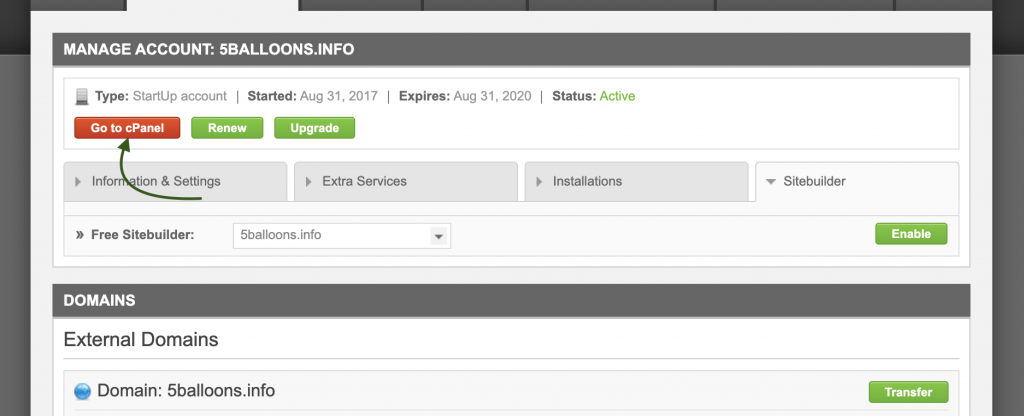
Choose the option to access cPanel securely. Once you are into cPanel, you should see a webpage with a lot of different options to play with.
In the next step, we will start with the migration stuff.
Step 2: Prepare Files to Host
A Wordpress site consists of two parts A filesystem and a database where your data is stored. In this step, we will transfer all the files that are associated with your WordPress website. This includes Wordpress core software, Media, Themes, Plugins, and many other files.
If you have your WordPress site hosted somewhere else you need to download all the files from that hosting, If you are migrating it from your localhost, go the directory and make a zip of the complete filesystem.
For example, in my case, I am transferring the website from a local MAMP server to SiteGround. Thus I made a zip of my complete site which is in MAMP/htdocs folder.
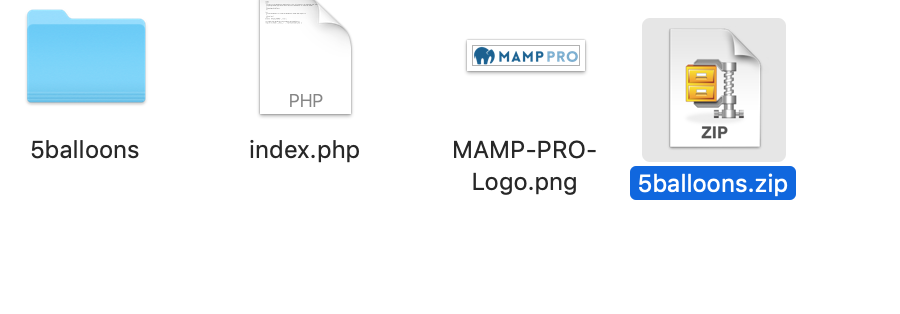
Once you have the zip folder we are now ready to move it to the SiteGround Server.
Step 3: Upload Website Files.
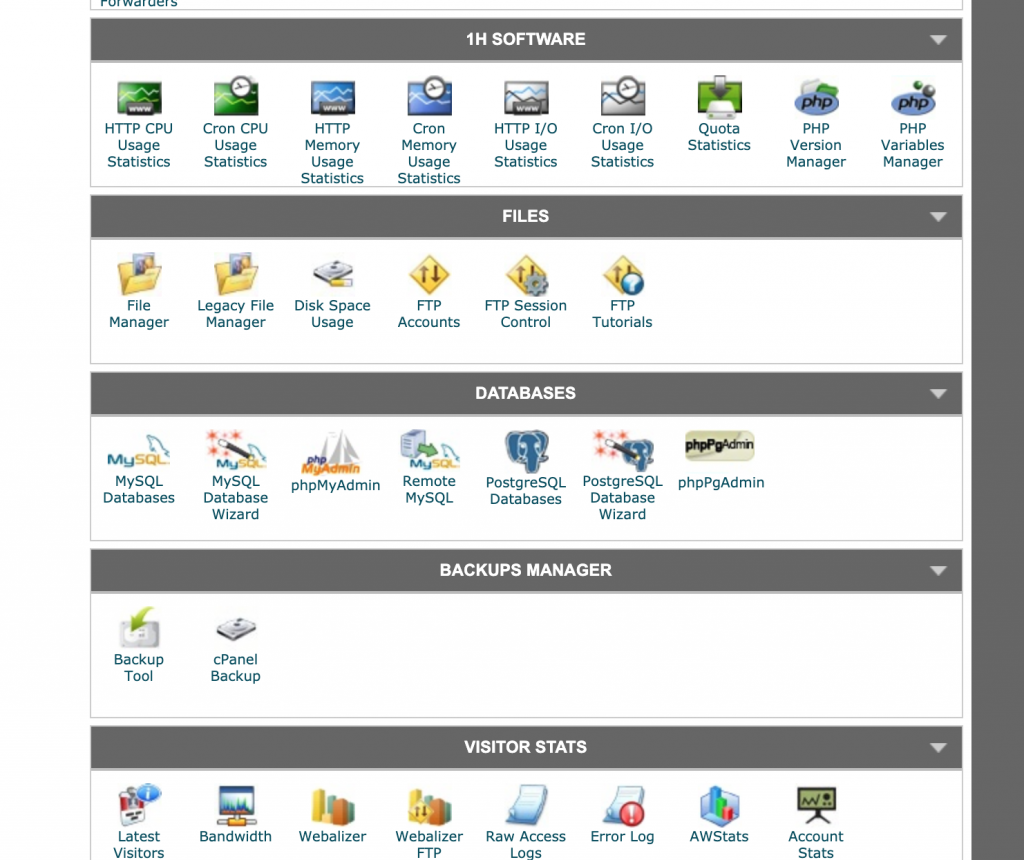
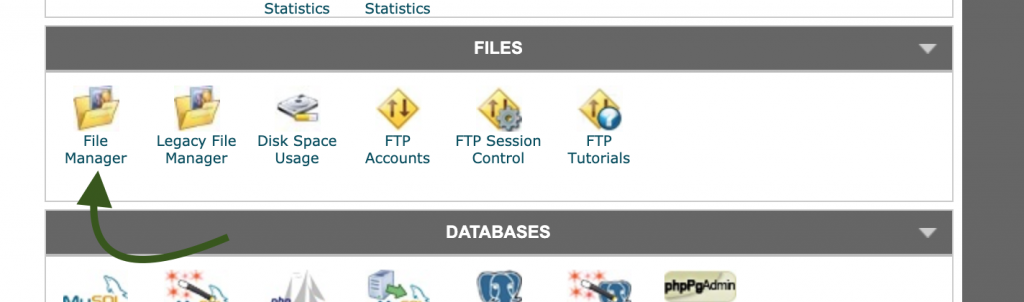
In the cPanel, click on File Manager which is inside the Files section.
Go to the document Root for the site that you are working with.
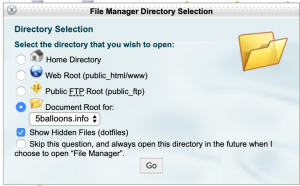
Document Root of the site is usually the directory named
public_html.
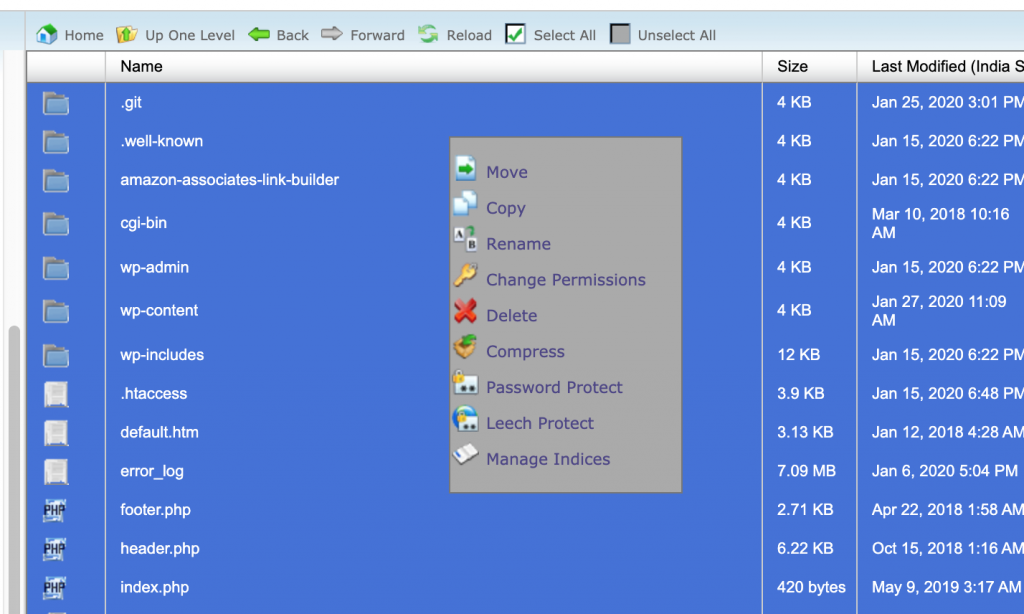
Once you are inside the File Manager, you should see a typical file manager toolbox with options on the top and directory structure like the image below.
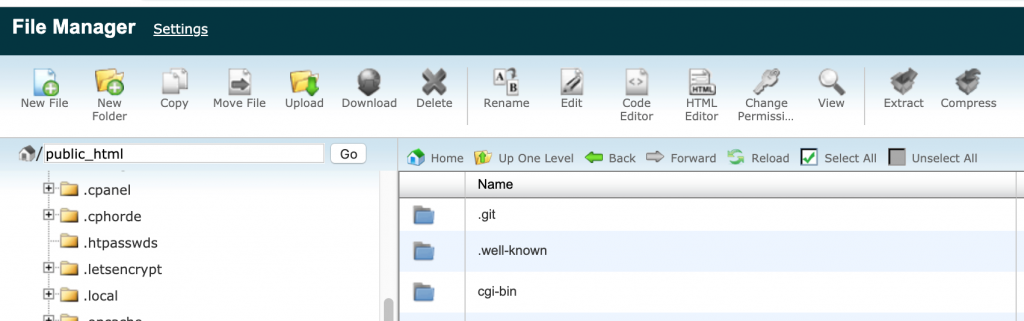
You might see a folder named .git, .well-known and cgi-bin inside the public_html folder if you have never hosted a site on SiteGround before. If you had a site hosted on SiteGround before which you are trying to replace you might see other WordPress folders such as wp-admin, wp-content, etc.
If you are replacing an old site, delete all the folders inside public_html.
Now time to upload the zip file of our new Wordpress website.
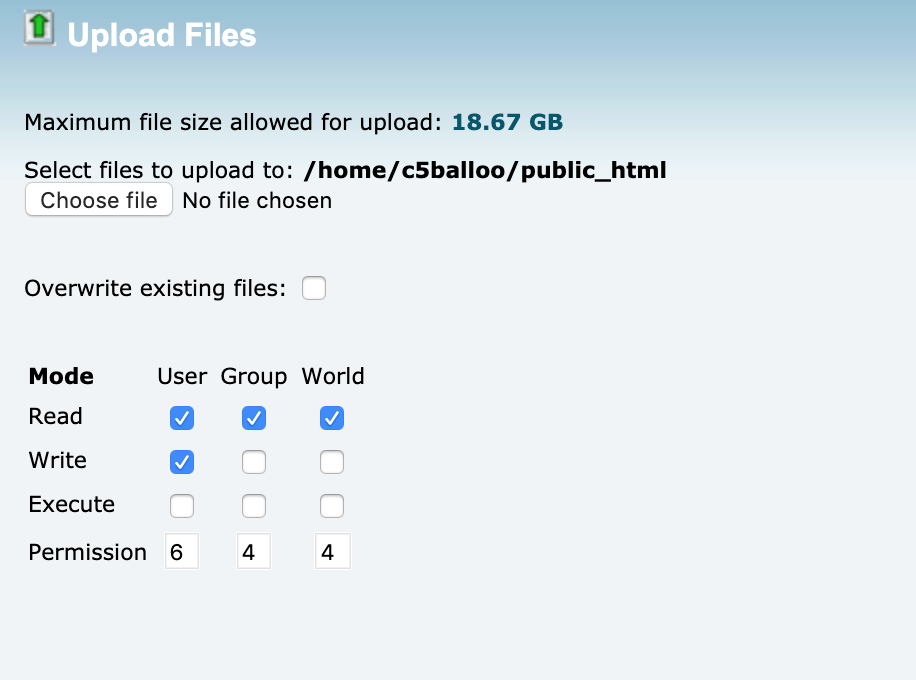
Choose the upload option from top navigation box.
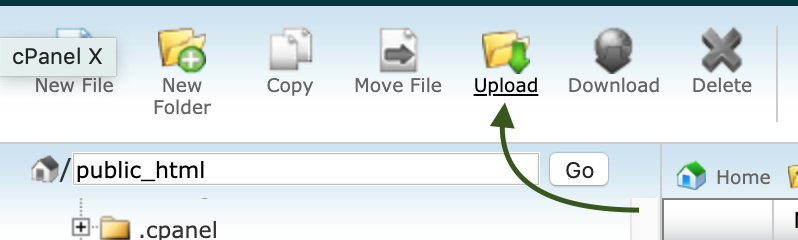
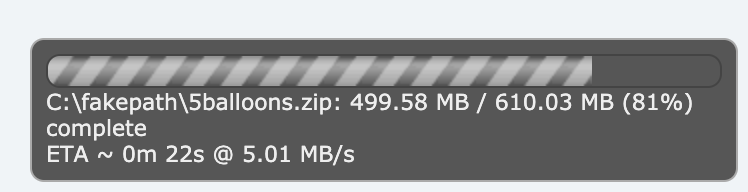
Choose the zip folder of your WordPress website to upload.
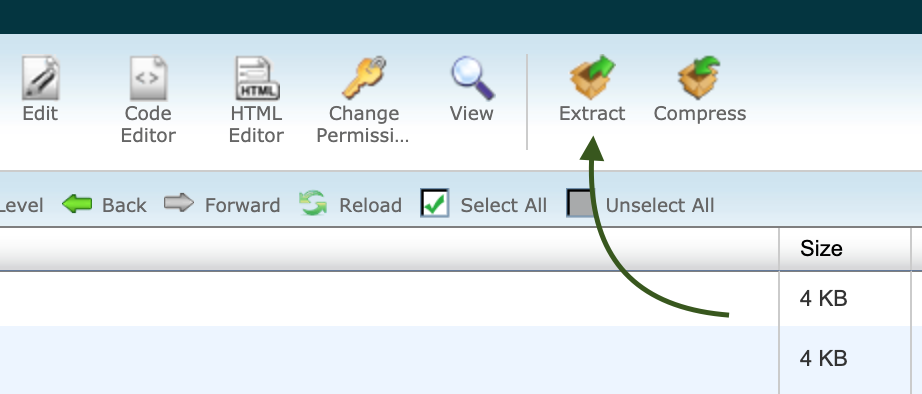
Once the zip folder is upload, move back to the file manager, select the zip file that you uploaded and select the Extract option.
Extract the files to the public_html directory.
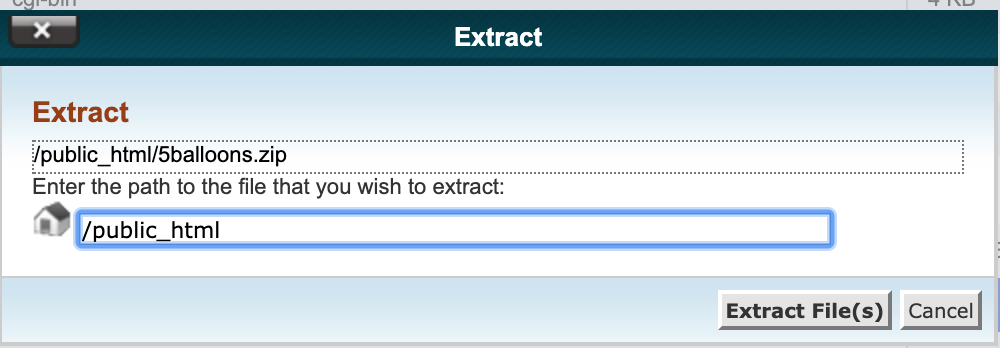
Note : Make sure the actual files are extracted to the public_html directory and not the folder that contains your WordPress files.
If there is a folder inside the public_html directory that contains all your WordPress core files, then move inside the folder, select all the files, right-click to select Move. And move all the files to the public_html directory.
Once the Wordpress Files are uploaded, your public_html should look like the image below.

Great Job Done, We now have our WordPress website files hosted on the SiteGround server. In the next step, we will deal with the database.
Step 4: Prepare Database SQL to Host
We are now ready to deal with the second part of our WordPress website i.e. database. If you are moving your site to SiteGround from localhost or from some other host, We first need to export SQL file of the database which contains all your data that includes posts, comments, etc.
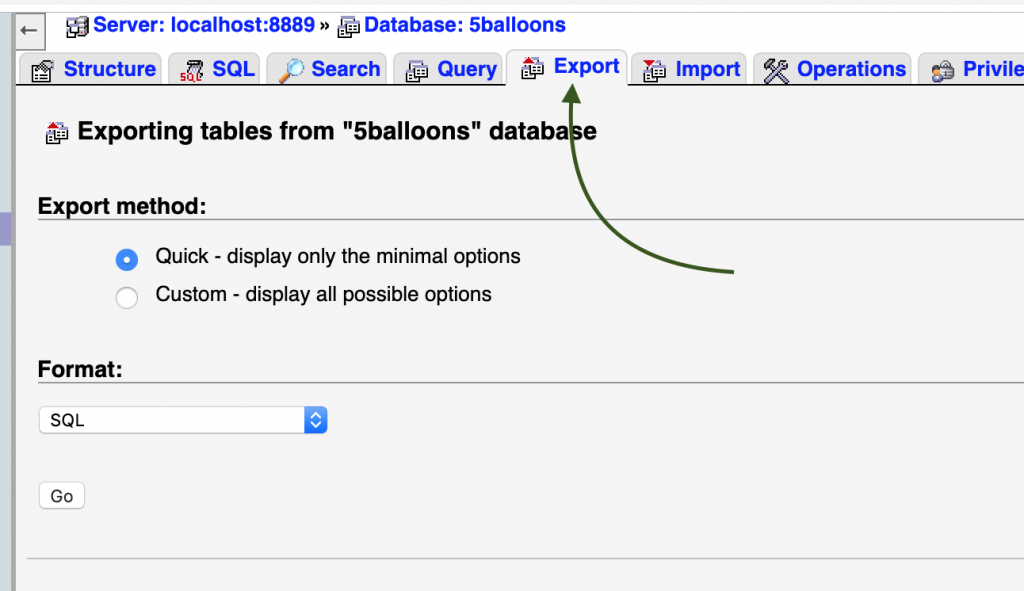
Open the tool that you use to manage the database. In my case, I am using PHPMyAdmin on my localhost provided by MAMP.
Select the database and choose the export option to export the database into SQL file.
Once you have the SQL file exported for the website database, we can upload it to SiteGround Server, Which we will cover in the next step.
Step 5: Upload Database on Server
In the cPanel, databases section click on MySQL Databases.
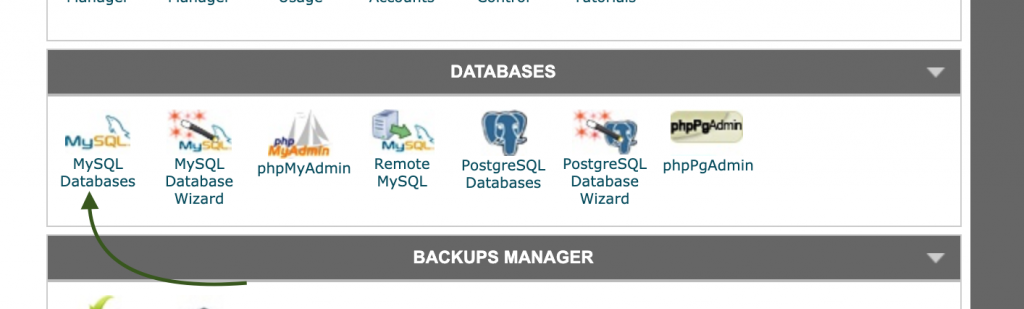
This will show you all the databases that are currently created in your SiteGround account. If there are none, you can create a new database to connect with your Wordpress site.

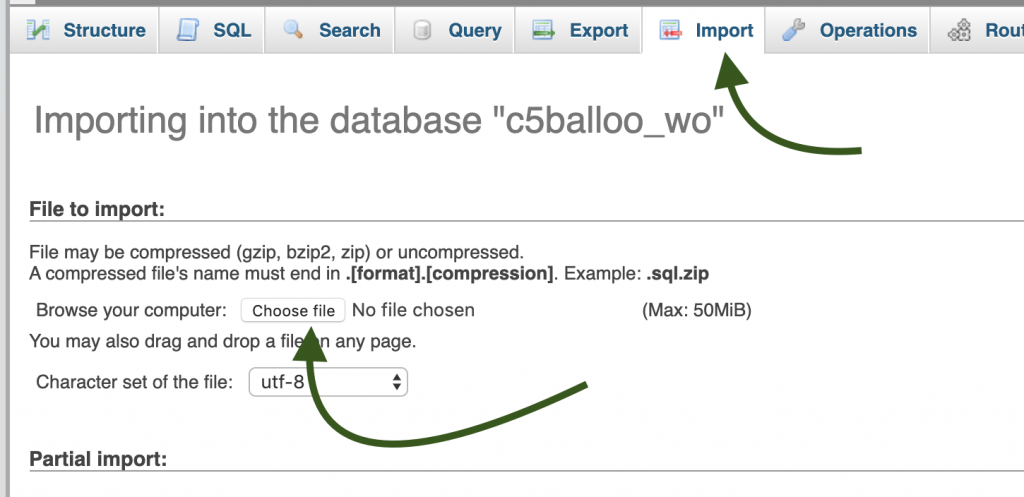
Once you have the database created, we can now move to phpMyAdmin to import the SQL file.
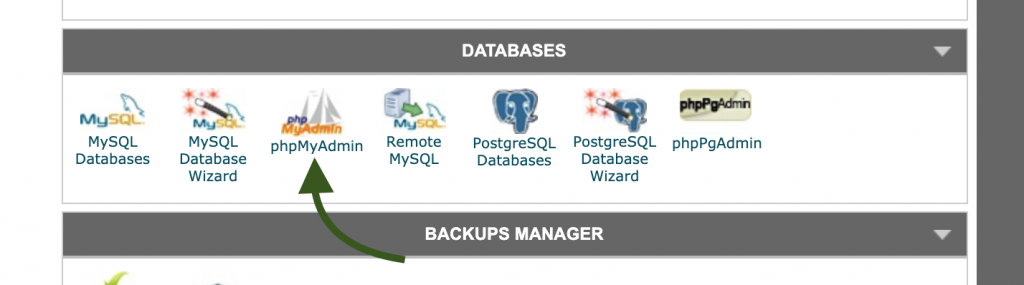
Once you are inside phpMyAdmin, select the database in which you want to import the SQL file. Click on the Import option and select the SQL file that we exported in the last step.
Once Imported, we can move to the next step where we will change the domain name of our website.
Step 6: Change Domain in Database
You don't need to perform this step if you are migrating your site from the same domain.
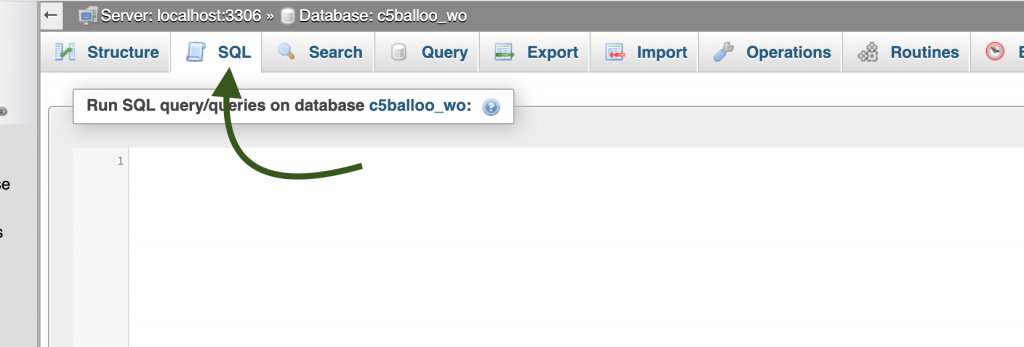
If you are migrating your site from a different domain or from localhost then you need to change the base URL in the database and also change the URL domain in the posts.
Go to PhpMyAdmin SQL Tab and Run the following queries.
UPDATE wp_options SET option_value = replace(option_value, 'http://www.olddomain.com', 'http://www.newdomain.com') WHERE option_name = 'home' OR option_name = 'siteurl';
UPDATE wp_posts SET post_content = replace(post_content, 'http://www.olddomain.com', 'http://www.newdomain.com');
UPDATE wp_postmeta SET meta_value = replace(meta_value,'http://www.olddomain.com','http://www.newdomain.com');
Note: If you are still testing your changes, and want to test changes via SiteGround IP address instead of the actual domain name. You can put your SiteGround IP in place of the new domain name.
Once you successfully run these queries we can move to the next step.
Step 7: Connect Wordpress Site to Database.
In this step, we will connect the two parts of the WordPress site filesystem and database. Go to the cPanel and select File Manager.
Inside the
public_html folder, look for the file named
wp_config.php and click Edit.

Change the following property as per the SiteGround database.
/** The name of the database for WordPress */
define('DB_NAME', 'your_database_name');

/** MySQL database username */
define('DB_USER', 'your_database_username');

/** MySQL database password */
define('DB_PASSWORD', 'your_database_password');

/** MySQL hostname */
define('DB_HOST', 'localhost');
Step 8: Access the Site via Domain Name or SiteGround IP.
That's All about how to migrate WordPress site to SiteGround. If you have DNS Setting of your Domain pointing towards SiteGround NameServers then you should be able to access the website via your domain name.