This article goes in detailed on implementing Laravel CRUD Operations. Create, Read, Update and Delete are the very basic operations that almost every application has. Creating a basic CRUD Operations in laravel is very simple thing in Laravel. Complexity of the operations are within the Laravel's framework and there is some basic configuration sorts of things which needs to be performed to make this working.
For this tutorial we will create a TaskManager, where you can create new tasks, show them as a list on the front page and modify or delete them.
Following are the framework versions and tools we are using for this tutorial
- Laravel Framework version 9
- MySQL
- Bootstrap version 4
Let's Dive into the Steps.
# Create Model, Migration and Resource Controller
Before we start with these steps, let's make sure you have a Laravel Installed in your system. We have named our application TaskManager. Also make sure you have a supporting mysql database created and have it you have your
database connected to the laravel project .
Laravel has some interesting artisan commands that will make your work a lot easier. If you are looking to create a Laravel CRUD application, Laravel has got a single artisan command that will create Model against your table, a migration file to create the table and also a
Resource Controller . Resource Controller in Laravel will have all the necessary methods in place that are required to create the CRUD application.
Let's start by running the command.
php artisan make:model Task -a
This command tell's the artisan to create a Model named Task and -a denoted
all, which means along with the Model file this will also generate the migration file that will create the database table for you and also will create a resource controller named
TaskController under folder app > http > Controller

Let's take a look at all the files that are generated by this command.
Task.php
<?php

namespace App;

use Illuminate\Database\Eloquent\Model;

class Task extends Model
{
    //
}
A model file named
Task.php will be generated directly under the app directory.
TaskController.php
<?php

namespace App\Http\Controllers;

use App\Task;
use Illuminate\Http\Request;

class TaskController extends Controller
{
    /**
     * Display a listing of the resource.
     *
     * @return \Illuminate\Http\Response
     */
    public function index()
    {
        //
    }

    /**
     * Show the form for creating a new resource.
     *
     * @return \Illuminate\Http\Response
     */
    public function create()
    {
        //
    }

    /**
     * Store a newly created resource in storage.
     *
     * @param  \Illuminate\Http\Request  $request
     * @return \Illuminate\Http\Response
     */
    public function store(Request $request)
    {
        //
    }

    /**
     * Display the specified resource.
     *
     * @param  \App\Task  $task
     * @return \Illuminate\Http\Response
     */
    public function show(Task $task)
    {
        //
    }

    /**
     * Show the form for editing the specified resource.
     *
     * @param  \App\Task  $task
     * @return \Illuminate\Http\Response
     */
    public function edit(Task $task)
    {
        //
    }

    /**
     * Update the specified resource in storage.
     *
     * @param  \Illuminate\Http\Request  $request
     * @param  \App\Task  $task
     * @return \Illuminate\Http\Response
     */
    public function update(Request $request, Task $task)
    {
        //
    }

    /**
     * Remove the specified resource from storage.
     *
     * @param  \App\Task  $task
     * @return \Illuminate\Http\Response
     */
    public function destroy(Task $task)
    {
        //
    }
}
A controller file named
TaskController.php will be generated under directory app > Http > Controllers . This Controller file contains definitions of all the methods that are required to create a Laravel CRUD application.
create_tasks_table.php
<?php

use Illuminate\Support\Facades\Schema;
use Illuminate\Database\Schema\Blueprint;
use Illuminate\Database\Migrations\Migration;

class CreateTasksTable extends Migration
{
    /**
     * Run the migrations.
     *
     * @return void
     */
    public function up()
    {
        Schema::create('tasks', function (Blueprint $table) {
            $table->increments('id');
            $table->timestamps();
        });
    }

    /**
     * Reverse the migrations.
     *
     * @return void
     */
    public function down()
    {
        Schema::dropIfExists('tasks');
    }
}
A new migration file will be generated under directory
database > migrations which contains a class
CreateTableTasks, This migration file will be used to generate our table
tasks that will manage the CRUD operations.
Now since we are now ready with the files to that will help in creating our Laravel CRUD application, lets move on to next step.
# Generating Database Table
Open the migrations file
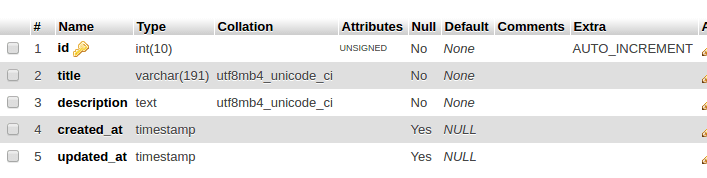
create_tasks_table.php and we will add certain fields into the up() method which are useful for our TaskManager application.
<?php

use Illuminate\Support\Facades\Schema;
use Illuminate\Database\Schema\Blueprint;
use Illuminate\Database\Migrations\Migration;

class CreateTasksTable extends Migration
{
    /**
     * Run the migrations.
     *
     * @return void
     */
    public function up()
    {
        Schema::create('tasks', function (Blueprint $table) {
            $table->increments('id');
            $table->string('title');
            $table->text('description');
            $table->timestamps();
        });
    }

    /**
     * Reverse the migrations.
     *
     * @return void
     */
    public function down()
    {
        Schema::dropIfExists('tasks');
    }
}
We have added two new fields, one is task
title of type
string and another is task
description of type text. Once you are ready with this file, Its time to run this migration file which should automatically generate the database table
tasks for us.
php artisan migrate

This should generate the required table in your database.
# Setting up the Routes
Now let's create the routes that will match our controller methods for all of the required actions like create, show all, edit etc.
Add this following line to your
web.php file under routes directory.
Route::resource('tasks', 'TaskController');
This code line works like magic, it will automatically assign many action verbs to the resource controller. Since we generated a resource controller, this line will internally map route names to different controller action.
TaskController already have methods stubbed for each of these actions, including notes informing you of the HTTP verbs and URIs they handle.
| Verb |
URI |
action (Controller method) |
Route Name |
| GET |
/tasks |
index |
tasks.index |
| GET |
/tasks/create |
create |
tasks.create |
| POST |
/tasks |
store |
tasks.store |
| GET |
/tasks/{task} |
show |
tasks.show |
| GET |
/tasks/{task}/edit |
edit |
tasks.edit |
| PUT/PATCH |
/tasks/{task} |
update |
tasks.update |
| DELETE |
/tasks/{task} |
destroy |
tasks.destroy |
# Creating Views and Layout
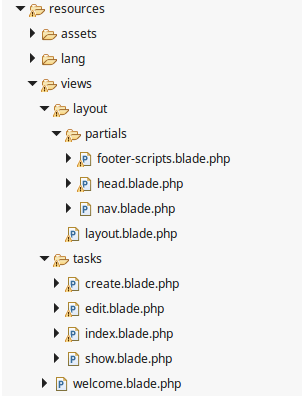
Since we have four GET methods in our routes which corresponds to the four pages, we will create a new directory under our resources >> views folder named
tasks and we will now create our view files named
create.blade.php ,
edit.blade.php,
index.blade.php and
show.blade.php.
We are using
Twitter Bootstrap v 4 for the consistent layout for our views. Since we are more focused on creating the Laravel CRUD operation in this tutorial, we will not cover the details of extending the layout. If you wish you can look into this article to
Include Bootstrap into your laravel application.
Following are the files which we have create in our views folder.
# Start Integrating Everything together.
Now we have everything in place Model, Controller, migration and routes. So let's start building the Laravel CRUD application.
#1 Showing all Tasks
| Description |
URL |
Controller Function |
View File |
| Default page for showing all tasks |
GET (taskmanager.dev/tasks) |
index() |
resources/views/tasks/index.blade.php |
Controller Function index()
    /**
     * Display a listing of the resource.
     *
     * @return \Illuminate\Http\Response
     */
    public function index()
    {
        $tasks = Task::all();
        return view('tasks.index',compact('tasks',$tasks));
    }
In this function we use the Task Eloquent Model and pass the variable to the view using compact function.
View File resources/views/index.blade.php
@extends('layout.layout')
@section('content')
@if (Session::has('message'))
<div class="alert alert-info">{{ Session::get('message') }}</div>
@endif
<table class="table">
<thead class="thead-dark">
<tr>
<th scope="col">#</th>
<th scope="col">Task Title</th>
<th scope="col">Task Description</th>
<th scope="col">Created At</th>
<th scope="col">Action</th>
</tr>
</thead>
<tbody>
@foreach($tasks as $task)
<tr>
<th scope="row">{{$task->id}}</th>
<td><a href="/tasks/{{$task->id}}">{{$task->title}}</a></td>
<td>{{$task->description}}</td>
<td>{{$task->created_at->toFormattedDateString()}}</td>
<td>
<div class="btn-group" role="group" aria-label="Basic example">
<a href="{{ URL::to('tasks/' . $task->id . '/edit') }}">
<button type="button" class="btn btn-warning">Edit</button>
</a>
<form action="{{url('tasks', [$task->id])}}" method="POST">
<input type="hidden" name="_method" value="DELETE">
<input type="hidden" name="_token" value="{{ csrf_token() }}">
<input type="submit" class="btn btn-danger" value="Delete"/>
</form>
</div>
</td>
</tr>
@endforeach
</tbody>
</table>
@endsection
This is all we have to do show all the tasks on the
tasks page of the application. You won't be able to see any data since the table is currently empty for testing purpose you can manually add some data into your table. Since we are yet to implement the creating task functionality.
#2 Creating/Adding new Task (View Page)
Next we will implement method and create a view file to show a page that contains the create task form.
| Description |
URL |
Controller Function |
View File |
| Form page for creating new task |
GET (taskmanager.dev/tasks/create) |
create() |
resources/views/tasks/create.blade.php |
Controller Function create()
    /**
     * Show the form for creating a new resource.
     *
     * @return \Illuminate\Http\Response
     */
    public function create()
    {
        return view('tasks.create');
    }
View File resources/views/create.blade.php
@extends('layout.layout')

@section('content')
    <h1>Add New Task</h1>
    <hr>
     <form action="/tasks" method="post">
     {{ csrf_field() }}
      <div class="form-group">
        <label for="title">Task Title</label>
        <input type="text" class="form-control" id="taskTitle"  name="title">
      </div>
      <div class="form-group">
        <label for="description">Task Description</label>
        <input type="text" class="form-control" id="taskDescription" name="description">
      </div>
      @if ($errors->any())
        <div class="alert alert-danger">
            <ul>
                @foreach ($errors->all() as $error)
                    <li>{{ $error }}</li>
                @endforeach
            </ul>
        </div>
      @endif
      <button type="submit" class="btn btn-primary">Submit</button>
    </form>
@endsection
Since Laravel 5.7 does not include functions of Laravel Collective inside its framework, In this tutorial we are creating our Forms with pain old HTML.
{{csrf_field}} creates a hidden input field in your form, which prevents your from cross site scripting attack. The form action points to
/tasks url with action post. Which invokes the
store method of our controller.
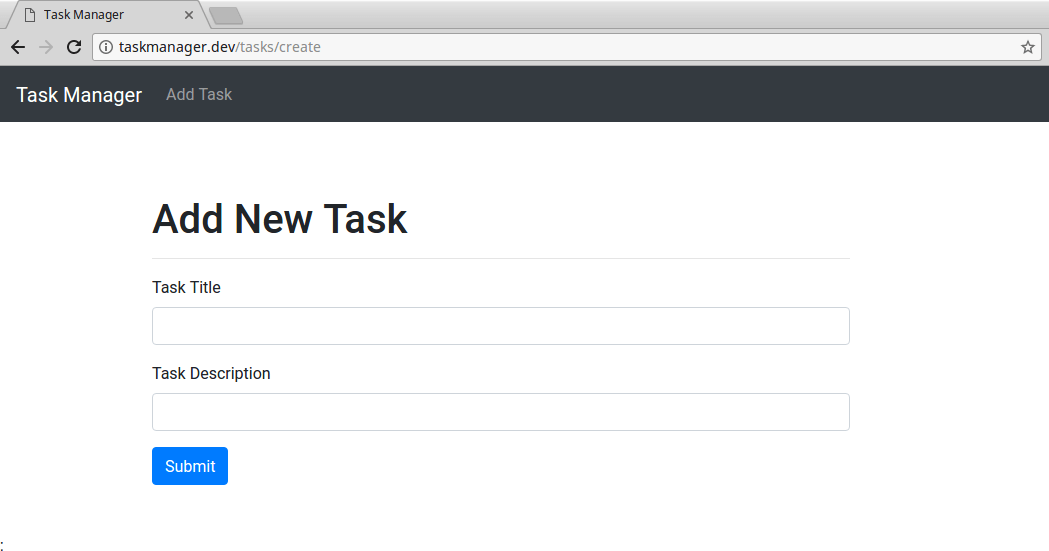
Further we have spitte out code to print out validation errors while creating a new task. Validation rules will be defined under store method. For now you should be able to see a create task form something like given below.
#3 Storing new Task
Let's implement the method which will take the data from the create form and will store it into the tasks table.
| Description |
URL |
Controller Function |
View File |
| Validate the input from cerate form and store it into database table |
POST (taskmanager.dev/tasks) |
store() |
NONE |
Controller Function store()
    /**
     * Store a newly created resource in storage.
     *
     * @param  \Illuminate\Http\Request  $request
     * @return \Illuminate\Http\Response
     */
    public function store(Request $request)
    {
        //Validate
        $request->validate([
            'title' => 'required|min:3',
            'description' => 'required',
        ]);

        $task = Task::create(['title' => $request->title,'description' => $request->description]);
        return redirect('/tasks/'.$task->id);
    }
As you can notice in the store method. Laravel provides a
validate method which will validate your variables inside the request object, and if they are not as per the requriement it will sent back to the previous page with error messages.
We have used create method which fills in the required attribures in your Eloqent model and saves them to the database. If you save this and submit your form Unfortunately you will come across a error message from laravel regarding
Mass Assignment Error.
This is because Laravel tries to prevent from user can spoof the form fields and send in the attributes which we dont want to store into the table. As an example user might try to send an extra field active with value of 1 while submitting new user registration form.
Thus we need to tell Laravel which table fields are allowed to be filled via Create method and this can be achieved by modifying our Task model
Task Model fillable attributes
namespace App;

use Illuminate\Database\Eloquent\Model;

class Task extends Model
{
    protected $fillable = ['title','description'];

    //or
    //protected $guarded = [];
}
You can fill give array of fillable data or you can also give array of guarded ( attibutes which we dont want to be filled). You should now be able to submit form to create new task.
#4 Showing a single task (Resource)
Let's implement method
show() which will help us to view a single task and a view file for it.
| Description |
URL |
Controller Function |
View File |
| Show one of the task |
GET (taskmanager.dev/tasks/{task}) |
show() |
resources/view/tasks/show.blade.php |
Controller Function show()
    /**
     * Display the specified resource.
     *
     * @param  \App\Task  $task
     * @return \Illuminate\Http\Response
     */
    public function show(Task $task)
    {
        return view('tasks.show',compact('task',$task));
    }
Resource controller uses the Route model binding, This means that you dont need to fetch the specified task by the id. Laravel will do it for you. $task variable which is passed into the
show() method is passed to the view via compact method.
View File resources/views/show.blade.php
@extends('layout.layout')

@section('content')
            <h1>Showing Task {{ $task->title }}</h1>

    <div class="jumbotron text-center">
        <p>
            <strong>Task Title:</strong> {{ $task->title }}<br>
            <strong>Description:</strong> {{ $task->description }}
        </p>
    </div>
@endsection
Since we have linked our task title in index page to the show page. You should be able to see this page on clicking on the Title.

#5 Edit Task / Resource (View)
This is to implement a method which will return the vew file to show user the edit form.
| Description |
URL |
Controller Function |
View File |
| Fetch task from database and allow editing |
GET (taskmanager.dev/tasks/{task}/edit) |
edit() |
resources/view/tasks/edit.blade.php |
Controller Function edit()
    /**
     * Show the form for editing the specified resource.
     *
     * @param  \App\Task  $task
     * @return \Illuminate\Http\Response
     */
    public function edit(Task $task)
    {
        return view('tasks.edit',compact('task',$task));
    }
Route model binding makes our task easier to fetch the task by id all we have to do is pass it along to the view via compact function.
View File resources/views/edit.blade.php
@extends('layout.layout')

@section('content')
    <h1>Edit Task</h1>
    <hr>
     <form action="{{url('tasks', [$task->id])}}" method="POST">
     <input type="hidden" name="_method" value="PUT">
     {{ csrf_field() }}
      <div class="form-group">
        <label for="title">Task Title</label>
        <input type="text" value="{{$task->title}}" class="form-control" id="taskTitle"  name="title" >
      </div>
      <div class="form-group">
        <label for="description">Task Description</label>
        <input type="text" value="{{$task->description}}" class="form-control" id="taskDescription" name="description" >
      </div>
      @if ($errors->any())
        <div class="alert alert-danger">
            <ul>
                @foreach ($errors->all() as $error)
                    <li>{{ $error }}</li>
                @endforeach
            </ul>
        </div>
      @endif
      <button type="submit" class="btn btn-primary">Submit</button>
    </form>
@endsection
To Modify the task, form data should be submitted to
/tasks URL with PUT/PATCH method. But If you notice the form method is
POST. Currently form method does not support PUT or DELETE method. As a workarond you we have to include a hidden field with name _method and value as
PUT.
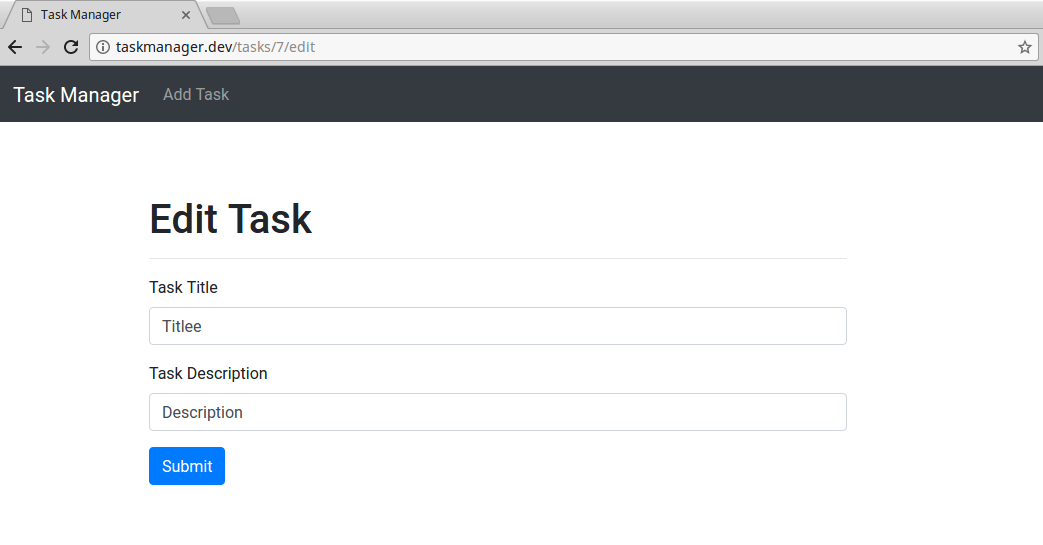
In the index page we have edit button linked to edit page against each task, Clicking on which will show you a page similar to this.
#6 Updating Task (Resource)
Let's implement method that will take the data from edit page , validate it and update it in the database table.
| Description |
URL |
Controller Function |
View File |
| Process the edit form and update data |
PUT (taskmanager.dev/tasks/{task}) |
store() |
NONE |
This controller method will process the edit form. It is very similar to
store(). We will
validate,
update, and
redirect.
Controller Function update()
    /**
     * Update the specified resource in storage.
     *
     * @param  \Illuminate\Http\Request  $request
     * @param  \App\Task  $task
     * @return \Illuminate\Http\Response
     */
    public function update(Request $request, Task $task)
    {
        //Validate
        $request->validate([
            'title' => 'required|min:3',
            'description' => 'required',
        ]);

        $task->title = $request->title;
        $task->description = $request->description;
        $task->save();
        $request->session()->flash('message', 'Successfully modified the task!');
        return redirect('tasks');
    }
Once you submit the edit form, the data will be validated, updated in database and user will be redirected with success message !
#7 Deleting / Destroying Task (Resource)
Let's take a look at the method implementation of deleting a task / resource
| Description |
URL |
Controller Function |
View File |
| Delete the task from the database and redirect to tasks page |
DELETE (taskmanager.dev/tasks/{task}) |
destroy() |
NONE |
Delete button form
<form action="{{url('tasks', [$task->id])}}" method="POST">
    		<input type="hidden" name="_method" value="DELETE">
   		<input type="hidden" name="_token" value="{{ csrf_token() }}">
   		<input type="submit" class="btn btn-danger" value="Delete"/>
</form>
Let's take time to review the DELETE button code which we included in the index.blade.php page. Against every task there is a DELETE button and same as the edit functionality we have created a form with POST method, and have included a hidden field named _method with value of
DELETE
Controller Function destroy()
    /**
     * Remove the specified resource from storage.
     *
     * @param  \App\Task  $task
     * @return \Illuminate\Http\Response
     */
    public function destroy(Request $request, Task $task)
    {
        $task->delete();
        $request->session()->flash('message', 'Successfully deleted the task!');
        return redirect('tasks');
    }
# Demo
# Laravel CRUD with TDD
If you are looking to get deeper into the CRUD, I have written an extensive article on how you can get started with Test Driven Development with an example of simple CRUD application. If you have understood CRUD, I will suggest you to take a look at the article to understand how test driven development works.
Getting started with TDD in Laravel with CRUD Example
# Conclusion
This tutorial has been updated to work with the current Laravel version i.e. 9
If you have any questions or comments regarding this implementation feel free to drop it in comments and I will make sure to answer it as soon as possible.