Tutorial : Multi Page / Step Form in Laravel with Validation
By Tushar·
In this tutorial we will go over Example of Multi Page / Step Form in Laravel with Validation. This tutorial does not use any javascript component to create multi step form.
Instead we will create multiple form pages and will use Laravel session to save the intermediate data.
Before starting on to this tutorial make sure you have a Laravel Setup Ready and you have connected it to a Database. You can take help from below tutorials for the setup to get started.
We are creating a Multi Page Form to Insert products into the database. You can use this example for any of your Multi-Step Form Submission with Validation in Laravel.
To give a brief about the Multi-Step Form. The Form will consist of three pages before the results are stroed in the database
First page will have the form fields to get basic information about the product (name, description etc.)
Second page will have the ability to upload image for the product
Third page is a review screen where user can see the information added and can submit the Form to database.
Once you are ready with the setup, Let’s dive into the steps.
Create Model, Controller and a Migration File.
Let’s start with Creating a Model, Controller and a Migration File for our Form Submission Example. Go to Terminal (Command Line) and Navigate to your project root directory.
Run following artisan command.
php artisan make:model Product -c -m
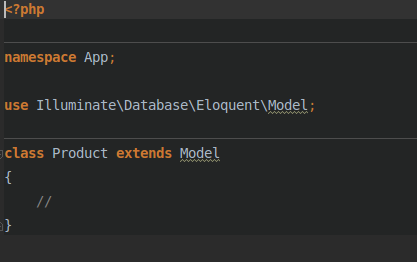
This artisan command will generate a Model file Product.php and since we have appended the command with additional parameters it will also generate a Controller ProductController.php and a migration file create_products_table.php
Here is how the File Looks
Product.php will be generated under app directory.
ProductController.php will be generated under app > Http > Controllers directory
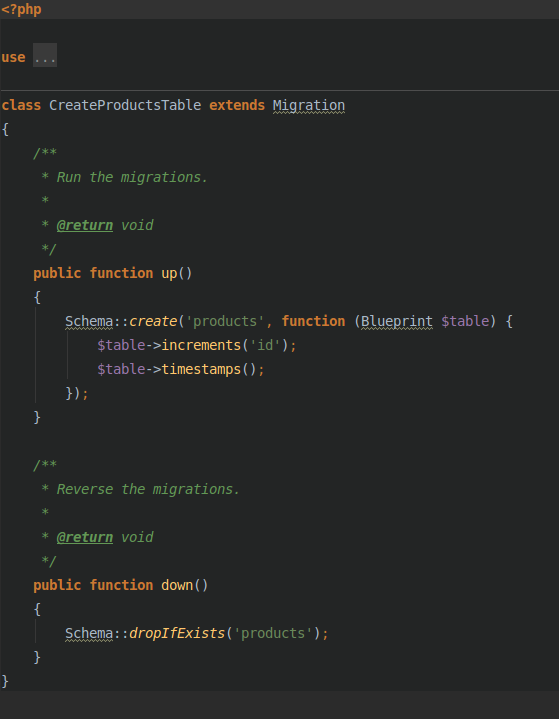
create_products_table.php migration file will be created under database > migrations folder.
Generate Database Table
As the next step, Let’s update our migration file to include the additional fields to store the Product properties, we will use this migration file to generate a database table for our example project.
Open create_products_table.php migration file and update the up() function as given below to add additional product parameters.
    public function up()
    {
        Schema::create('products', function (Blueprint $table) {
            $table->increments('id');
            $table->string('name');
            $table->string('company');
            $table->longText('description');
            $table->float('amount');
            $table->boolean('available');
            $table->string('productimg');
            $table->timestamps();
        });
    }
Now open your terminal, move to project root directory and run the following command to generate database tables form migration files.
php artisan migrate
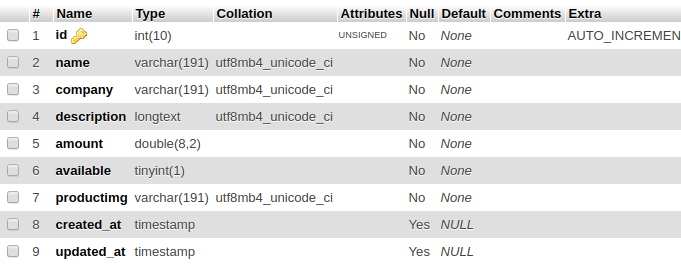
This will generate products table in the database along with the other default tables provided by Laravel.
Here is how the generated products table structure looks
Create Routes, Controller Method and Blade Page for Step 1 of Multi-Step Process
The first page of multi page Laravel form will have form fields to input information about the product.This will require a route entry , a corresponding Controller Method and a View file that will be returned by the Controller. Let’s do it one by one.
Open your web.php route file located under routes folder and add following entry into the file.
These route entries will handle the show form as well as form post method, Let's go ahead and add corresponding controller methods
    /**
     * Show the step 1 Form for creating a new product.
     *
     * @return \Illuminate\Http\Response
     */
    public function createStep1(Request $request)
    {
        $product = $request->session()->get('product');
        return view('products.create-step1',compact('product', $product));
    }

    /**
     * Post Request to store step1 info in session
     *
     * @param  \Illuminate\Http\Request  $request
     * @return \Illuminate\Http\Response
     */
    public function postCreateStep1(Request $request)
    {

        $validatedData = $request->validate([
            'name' => 'required|unique:products',
            'amount' => 'required|numeric',
            'company' => 'required',
            'available' => 'required',
            'description' => 'required',
        ]);

        if(empty($request->session()->get('product'))){
            $product = new Product();
            $product->fill($validatedData);
            $request->session()->put('product', $product);
        }else{
            $product = $request->session()->get('product');
            $product->fill($validatedData);
            $request->session()->put('product', $product);
        }

        return redirect('/products/create-step2');

    }
createStep1 function is to display step-1 form page to the user and postCreateStep1 method will handle the post request from the step-1 form. The data is validated using Laravel's inbuilt validation system and then stored into the session. User is then redirected to step-2 form page.
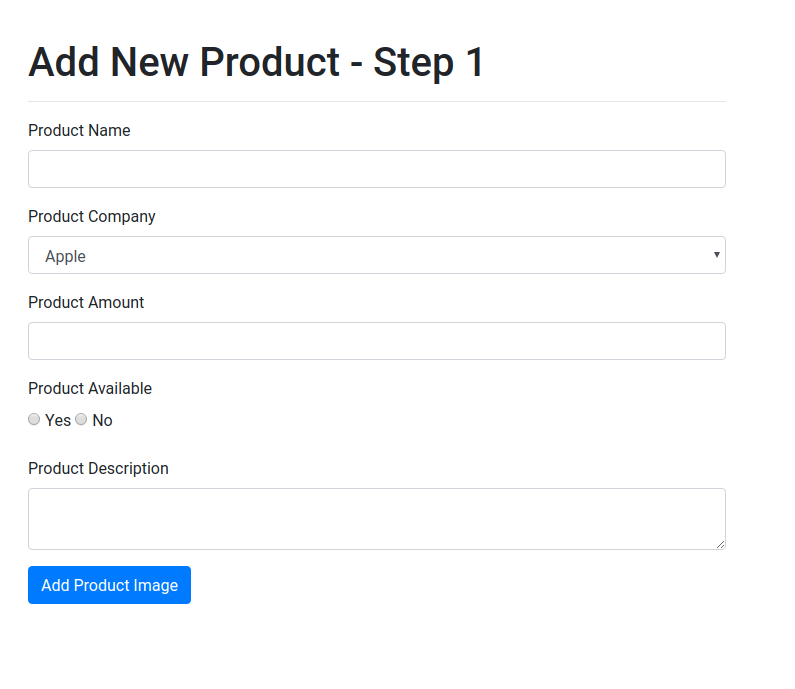
Create a new file create-step1.blade.php under resources > views > products and add following contents to create a HTML form.
Once you have completed these steps, navigate to /products/create-step1 url of your project. You should be able to see a Create products form in your application.
Create Routes, Controller Method and Blade Page for Step 2 of Multi-Step Process
Let's go ahead and create necessary code to create second page of our multi step form in laravel.
Open your web.php route file located under routes folder and add following entry into the file.
These route entries will handle the show form as well as form post method, Let's go ahead and add corresponding controller methods
 /**
     * Show the step 2 Form for creating a new product.
     *
     * @return \Illuminate\Http\Response
     */
    public function createStep2(Request $request)
    {
        $product = $request->session()->get('product');
        return view('products.create-step2',compact('product', $product));
    }

    /**
     * Post Request to store step1 info in session
     *
     * @param  \Illuminate\Http\Request  $request
     * @return \Illuminate\Http\Response
     */
    public function postCreateStep2(Request $request)
    {
        $product = $request->session()->get('product');
        if(!isset($product->productImg)) {
            $request->validate([
                'productimg' => 'required|image|mimes:jpeg,png,jpg,gif,svg|max:2048',
            ]);

            $fileName = "productImage-" . time() . '.' . request()->productimg->getClientOriginalExtension();

            $request->productimg->storeAs('productimg', $fileName);

            $product = $request->session()->get('product');

            $product->productImg = $fileName;
            $request->session()->put('product', $product);
        }
        return redirect('/products/create-step3');

    }

    /**
     * Show the Product Review page
     *
     * @return \Illuminate\Http\Response
     */
    public function removeImage(Request $request)
    {
        $product = $request->session()->get('product');
        $product->productImg = null;
        return view('products.create-step2',compact('product', $product));
    }
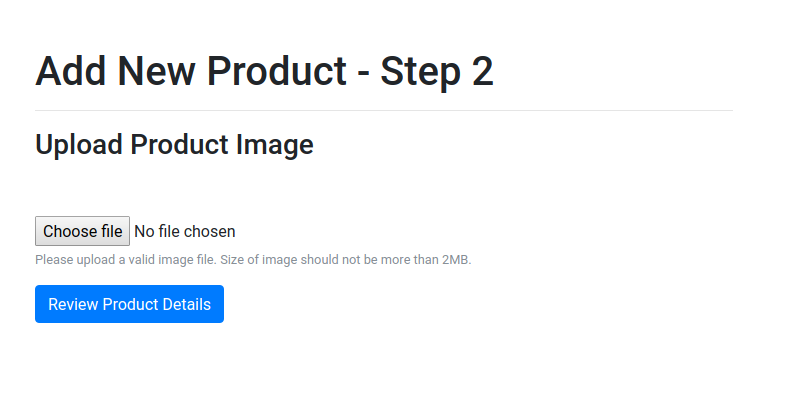
Create a new file create-step2.blade.php under resources > views > products and add following contents to create a HTML form for second page of multi-step form.
Once you have completed these steps, enter information in step-1 of create product form and you should be redirected to step-2 page which should look like below.
If you face difficulty in uploading the file / images and making them public, Please follow steps in following tutorial Example of File Upload with Validation in Laravel 5.6
Create Routes, Controller Method and Blade Page for Step 3 of Multi-Step Process
Let's go ahead and create necessary code to create third page of our multi step form in laravel. In this step user can review the information added in first two steps and if required can go back to edit the information.
Open your web.php route file located under routes folder and add following entry into the file.
These route entry will handle the GET request to the review page of our multi step form and will also handle the final POST request to put data into database.
Open your ProductController.php and add corresponding controller methods into the database.
    /**
     * Show the Product Review page
     *
     * @return \Illuminate\Http\Response
     */
    public function createStep3(Request $request)
    {
        $product = $request->session()->get('product');
        return view('products.create-step3',compact('product',$product));
    }

    /**
     * Store product
     *
     * @return \Illuminate\Http\Response
     */
    public function store(Request $request)
    {
        $product = $request->session()->get('product');
        $product->save();
        return redirect('/products');
    }
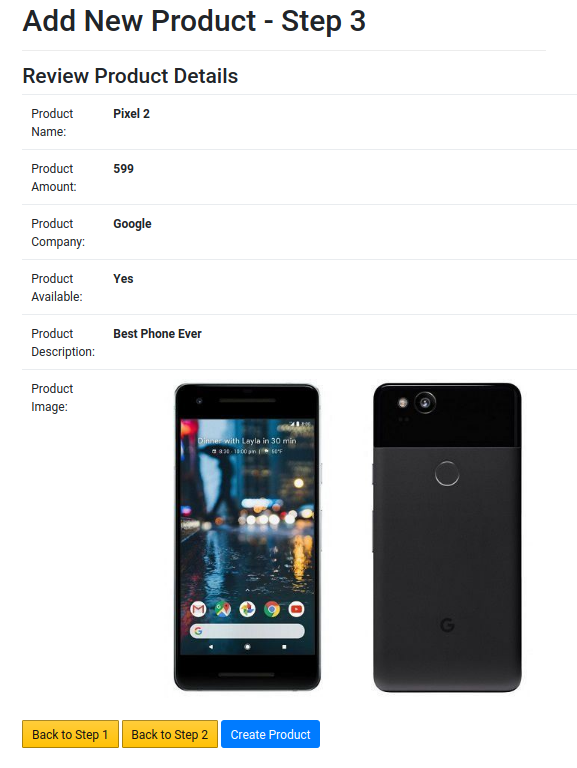
Create a new file create-step3.blade.php under resources > views > products and add following contents to create a HTML form for second page of multi-step form.
Once you upload image in the second space and move to review the information added. You should be redirected to the third and final step and it should look something like below
Click on Create Product and it should trigger the store method of the ProductController and the information should have be added to the database.
Show All Products
As a bonus, Let’s create a index page, where we will show all the products.
Open your web.php route file and add following entry for the index page.
Add the corresponding index method to ProductController
 /**
     * Display a listing of the prducts.
     *
     * @return \Illuminate\Http\Response
     */
    public function index()
    {
        $products = Product::all();
        return view('products.index',compact('products',$products));
    }
We make use of Eloquent all() method to get all the products in the database. Further we make use of compact method to pass the products object to index page.
Create a new page index.blade.php and put following contents into the file.
I have used Bootstrap Template Layout integration in this project, You can Integrate Bootstrap into your Laravel Application for similar User Interface.
If you found this tutorial helpful and if you have any questions, Let me know in comments. You might also find other related tutorials useful.

 This will generate products table in the database along with the other default tables provided by Laravel.
Here is how the generated products table structure looks
This will generate products table in the database along with the other default tables provided by Laravel.
Here is how the generated products table structure looks
 If you face difficulty in uploading the file / images and making them public, Please follow steps in following tutorial Example of File Upload with Validation in Laravel 5.6
 Click on Create Product and it should trigger the store method of the ProductController and the information should have be added to the database.